Send the rate con and dispatch
Send the carrier their rate confirmation, add the driver and truck, and send the dispatch sheet.
Steps
Each picture has a red box around what to click. Words in bold are the names you will see on the screen.
Step 1: Open the Documents section
On the load page click Documents in the bar below the title. The buttons across the top send each paper. Click Send Rate Con.
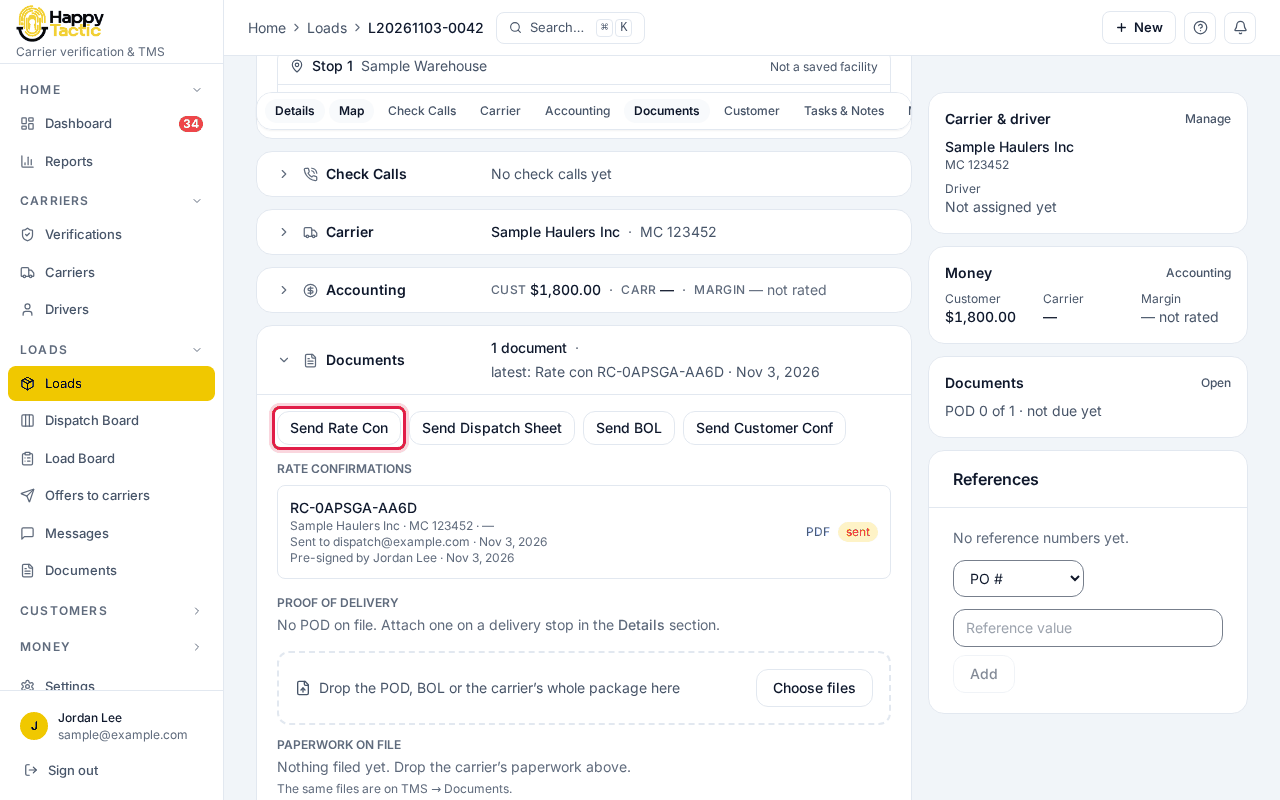
You should see: A form opens.
Step 2: If you see the setup reminder
The first time, a yellow box says “Finish setting up before you send your first rate confirmation”. It lists your company profile, your signature and your rate confirmation terms. Fix them with Open the setup checklist, or click Send anyway.
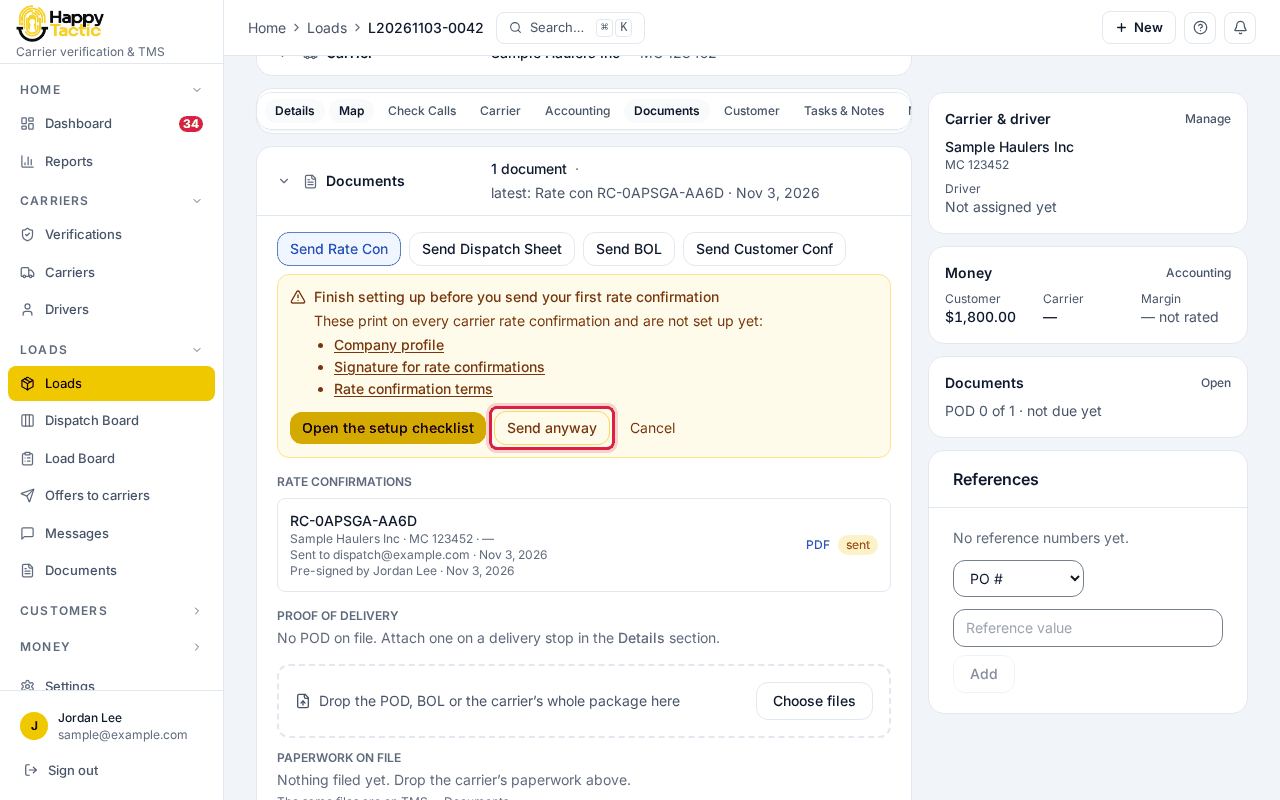
You should see: Those three things print on every rate confirmation, so it is better to set them up first.
Step 3: Send the PDF
Leave the Recipient box empty to send it to the carrier’s email on file, or type another address. Click Send PDF.
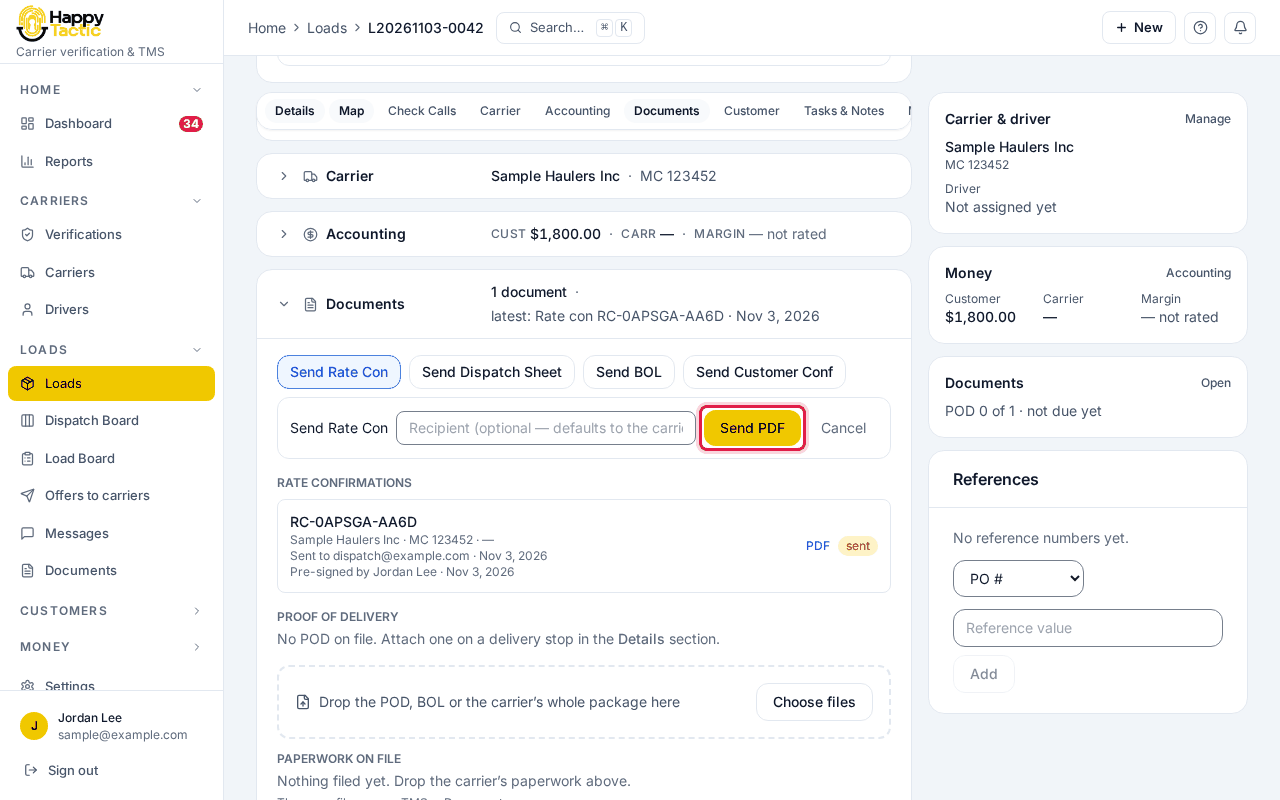
You should see: The rate confirmation appears in the list below with the label sent.
Step 4: Check the status
Look at Rate confirmations. Each one shows who it was sent to, the date, and its status.
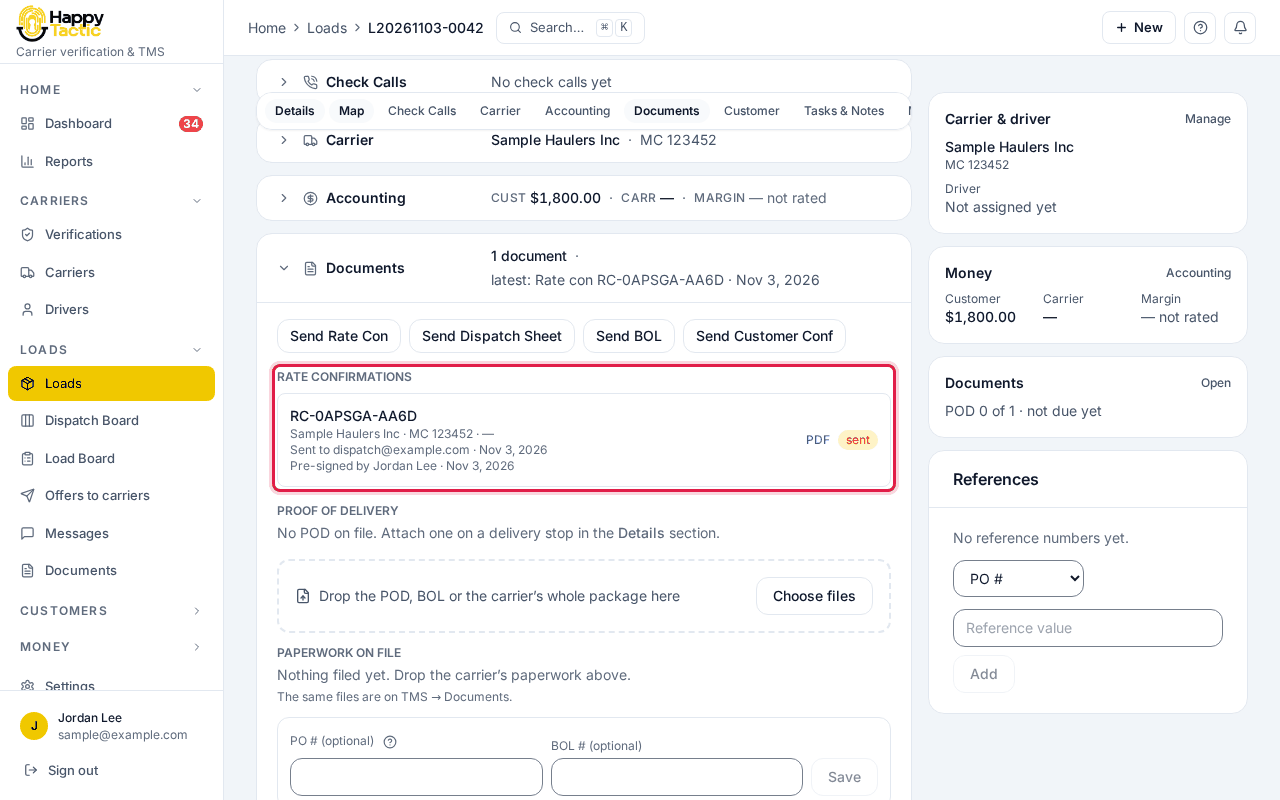
You should see: The status moves on as the carrier opens and signs it.
Step 5: Add the driver and truck
Click Carrier, then Assign driver & truck. Choose the Driver, Truck and Trailer, then click Assign.
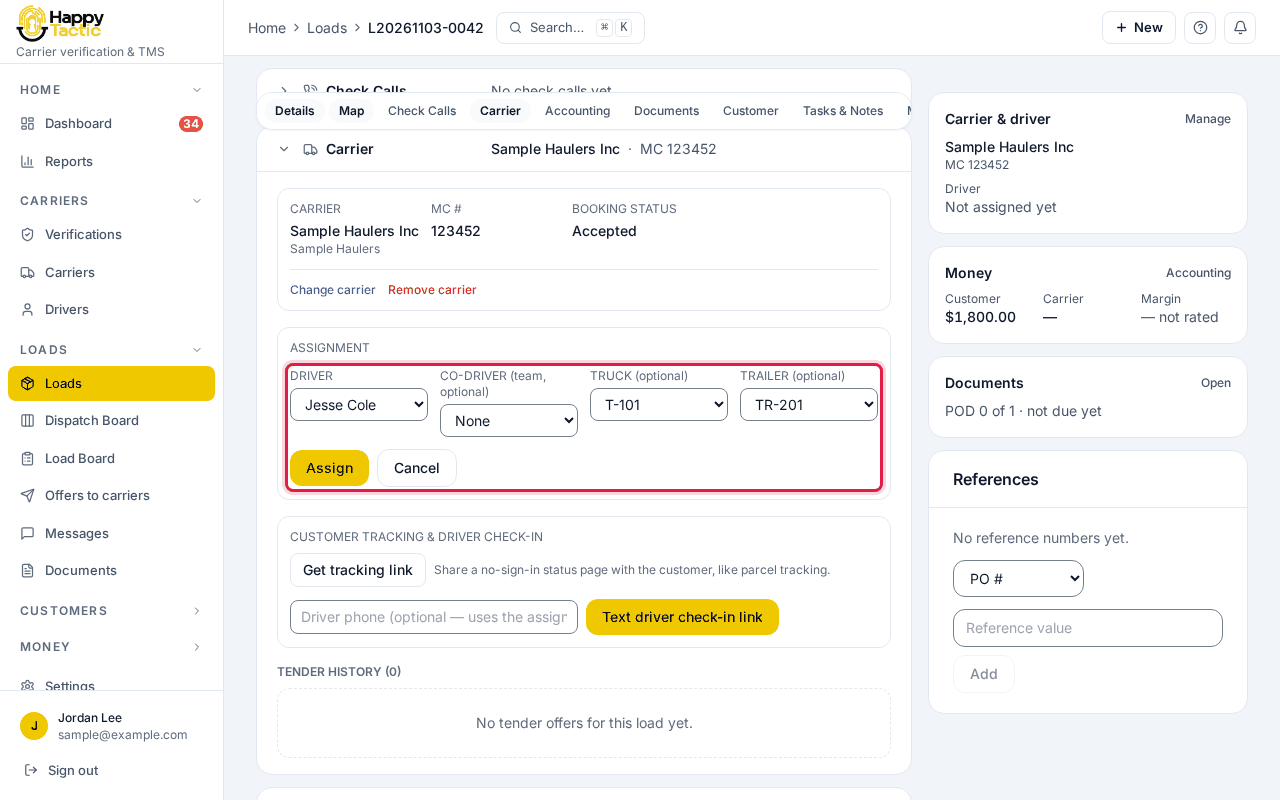
You should see: The driver, truck and trailer show on the load, and tracking and the dispatch sheet use them.
Step 6: If the driver is busy on another load
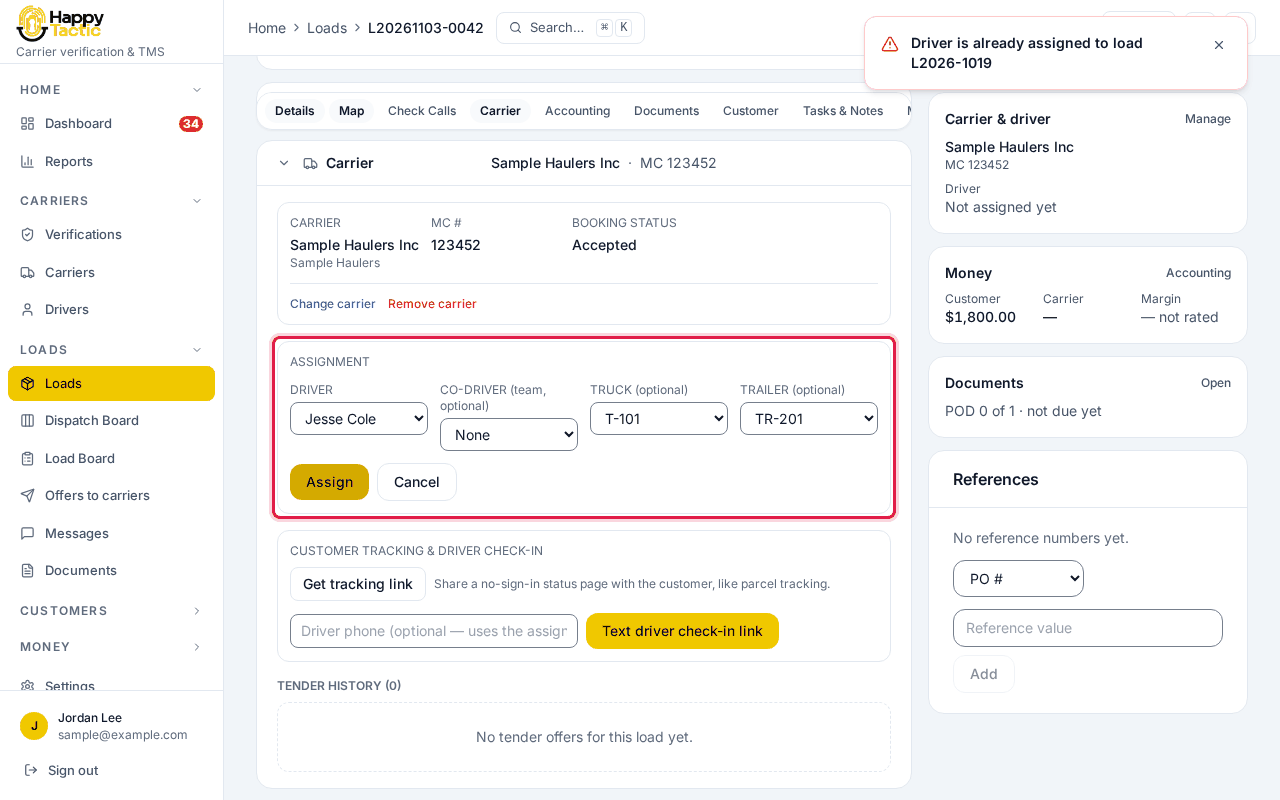
You may see a red message “Driver is already assigned to load …”. Pick a different driver, or finish the other load first.
Step 7: Send the dispatch sheet
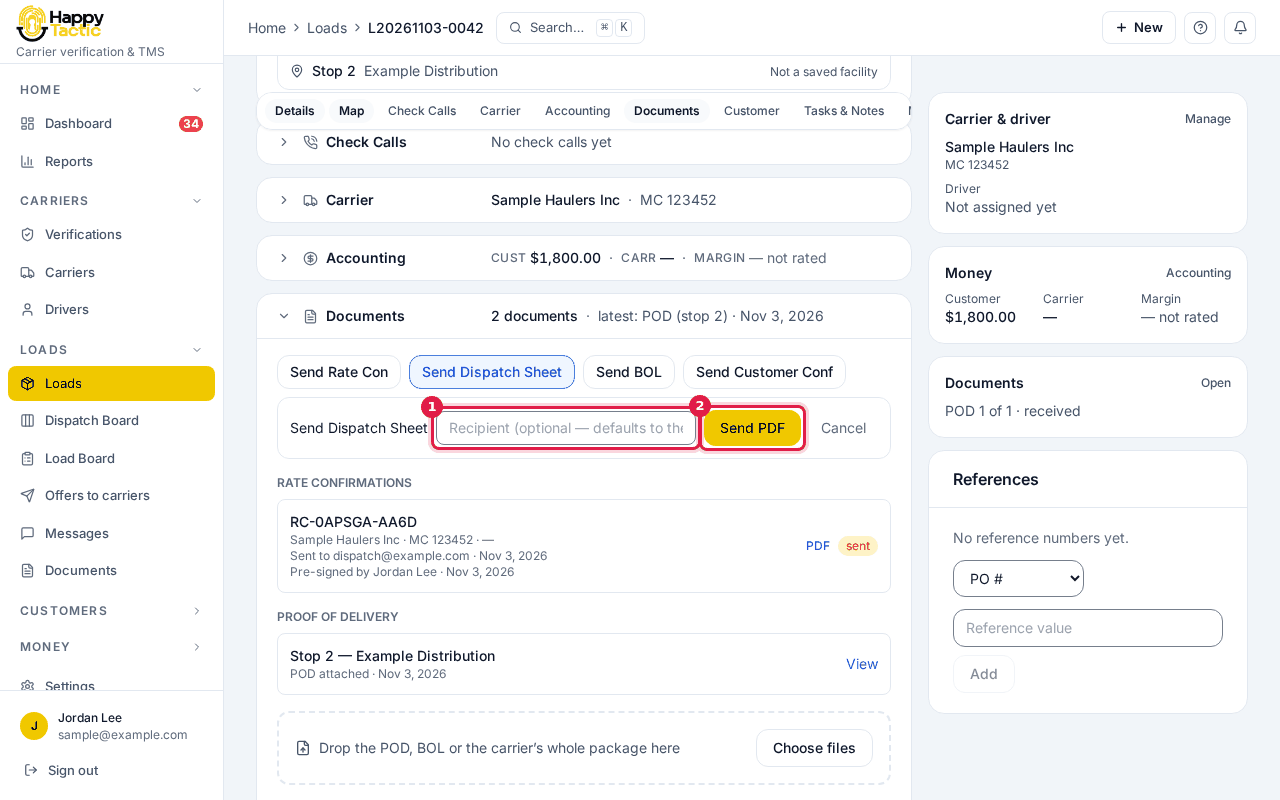
Back in Documents, click Send Dispatch Sheet, then Send PDF. This gives the driver the stops, times and reference numbers.
Step 8: Move the load forward
The yellow button at the top right always shows the load’s next step, for example Mark as Available. Click it when that step is done.
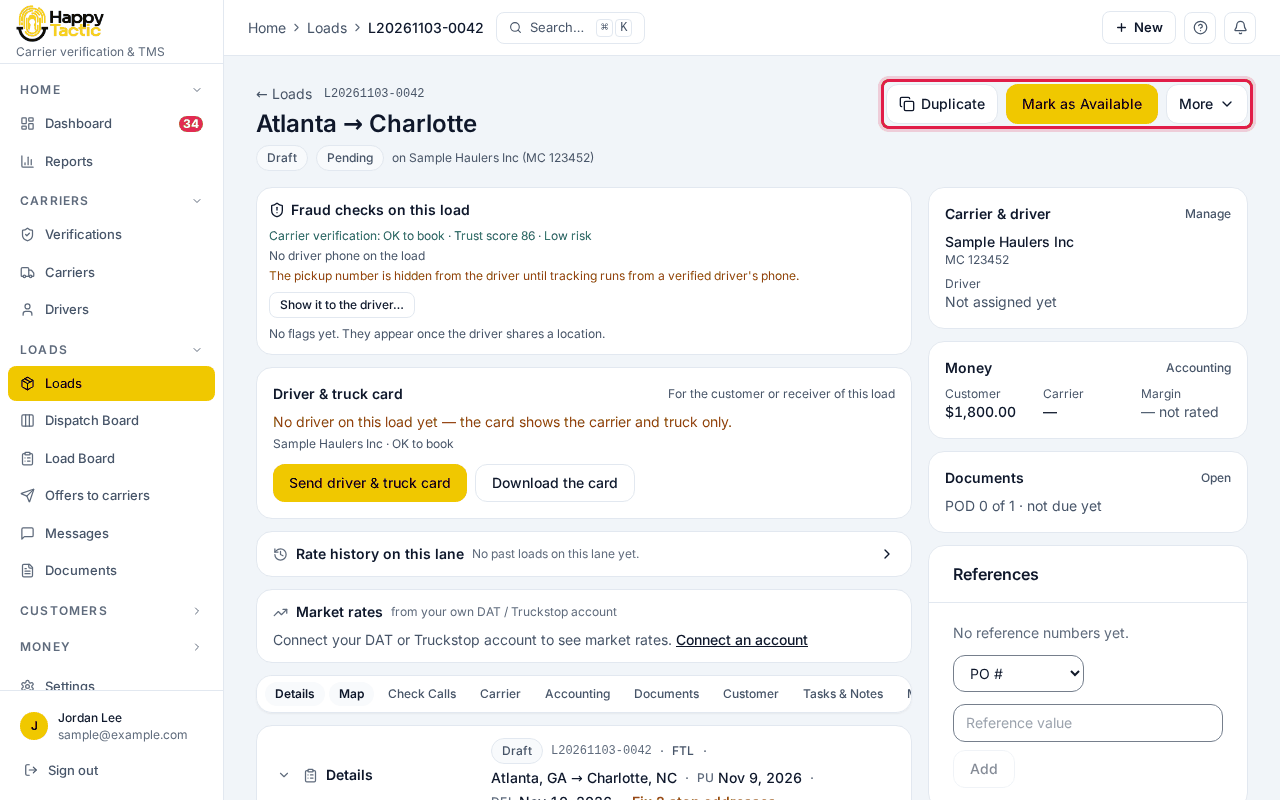
You should see: The status changes and a new next step appears. Everything is written to the load’s history.
If something goes wrong
- The Send Rate Con button does nothing, or asks for a carrier.
- Book a carrier on the load first (see Create a load and book a carrier).
- The carrier has not signed.
- Send the rate confirmation again with Send Rate Con. If you have the automatic steps switched on, a reminder also goes out for you.
- The driver does not show in the list.
- The list shows the booked carrier’s drivers. Add the driver on the Drivers page with + Add a driver.
Still stuck? Open Help & Support in the left menu of the app and send us a message.
What next
These guides usually come next: