Bill the load
Turn a delivered load into an invoice and send it to your customer.
Steps
Each picture has a red box around what to click. Words in bold are the names you will see on the screen.
Step 1: Find the Ready to bill box
Open a delivered load. The Ready to bill box shows what the invoice still needs.
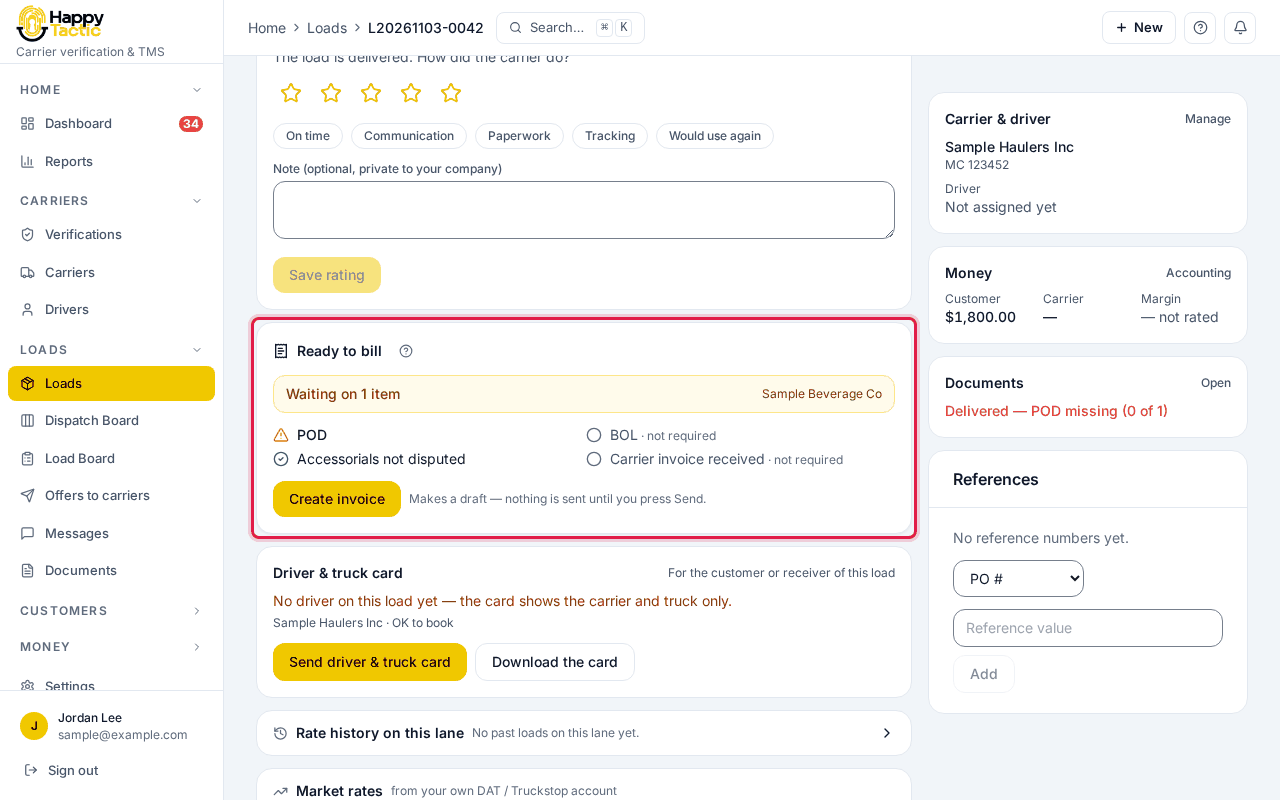
You should see: A yellow bar says how many items you are waiting on.
Step 2: Read the checklist
Each line is a paper your customer’s rules need. A green tick is done. A triangle is missing. Items marked “not required” do not hold you up.
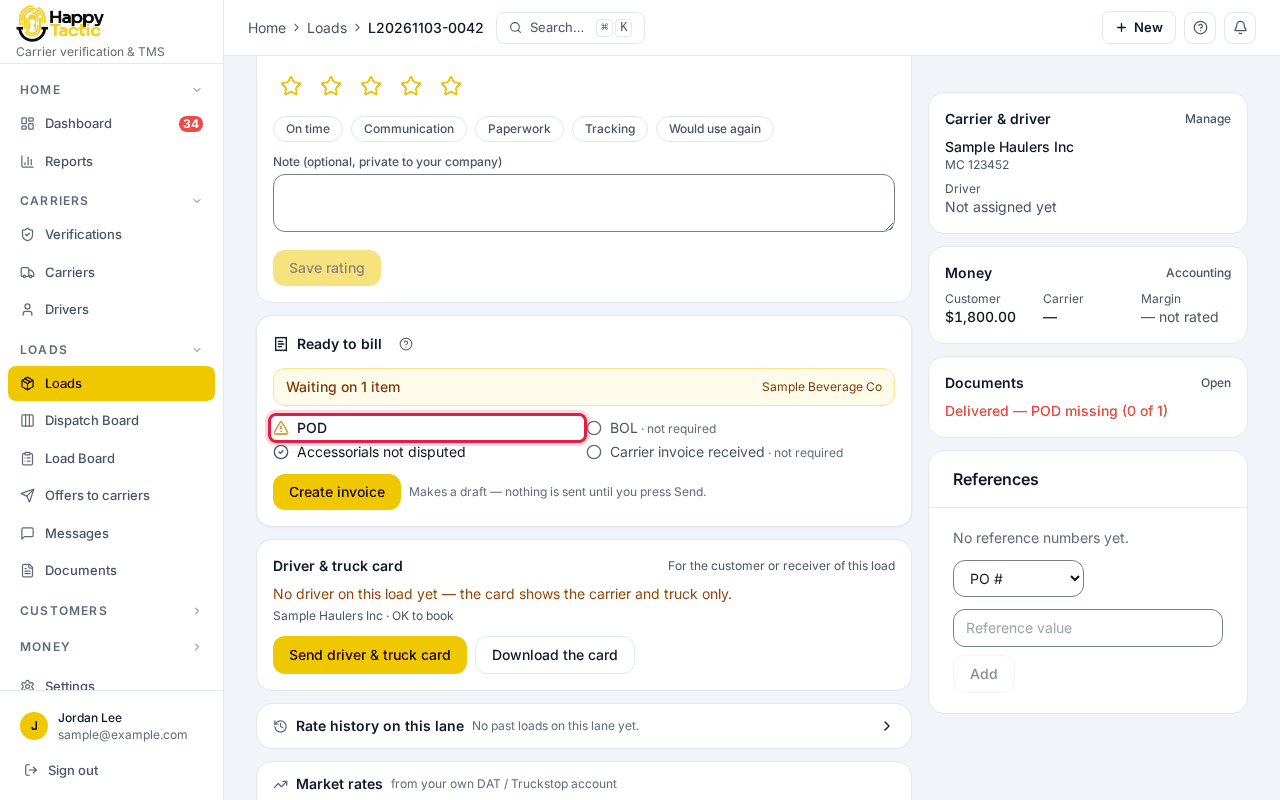
You should see: The usual missing item is the POD, the signed proof of delivery.
Step 3: Upload the POD
Click Documents in the bar under the title, then click Choose files and pick the POD (a photo or PDF), or drop it onto the box.
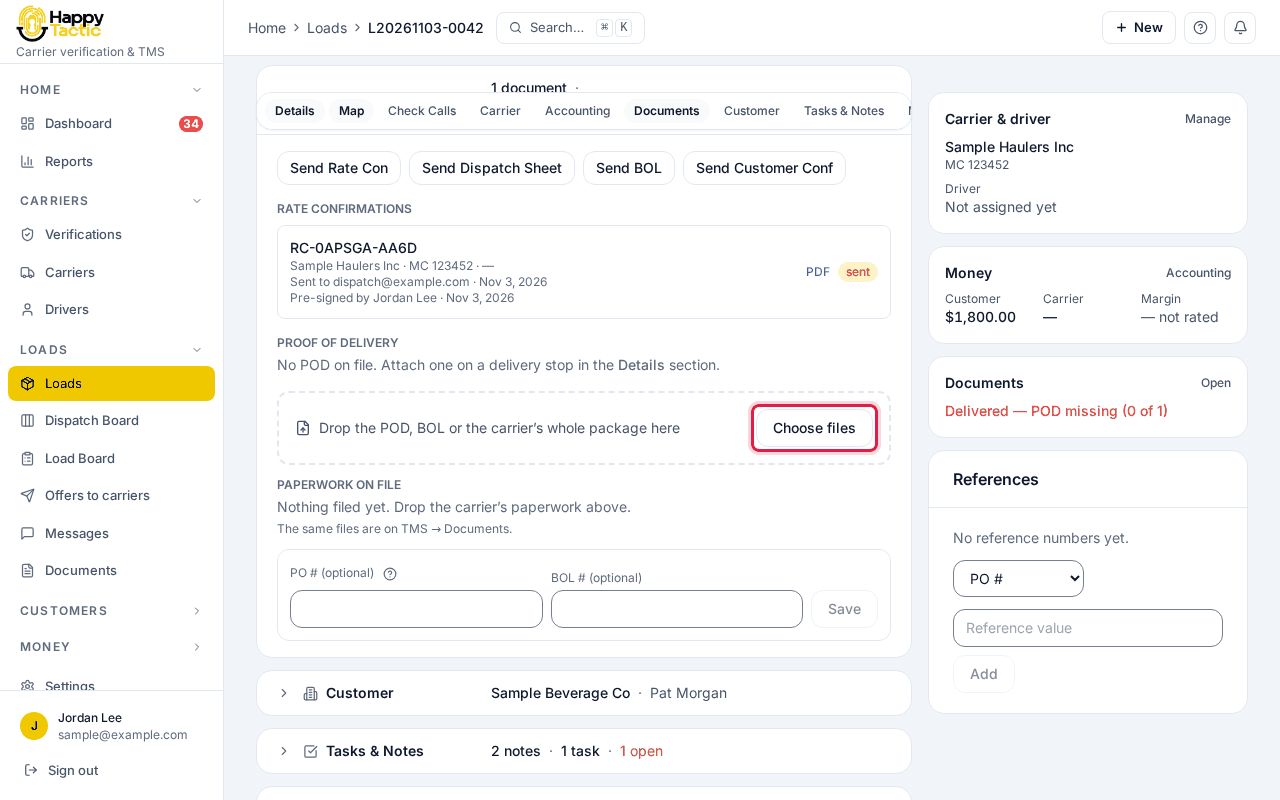
Step 4: See the box turn green
Go back to the Ready to bill box. The POD line now has a green tick.
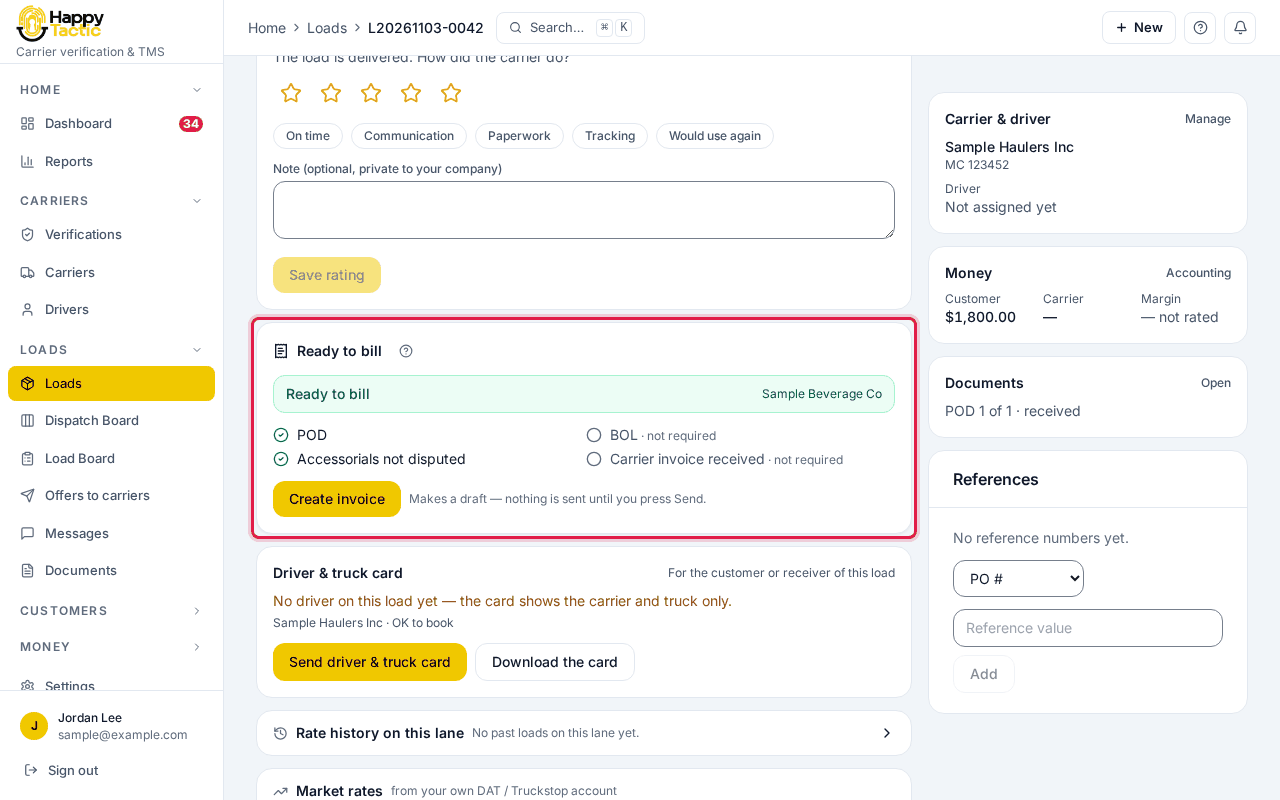
You should see: If your company has Create the invoice draft when the paperwork is uploaded switched on (under Settings, then Workflow), a draft may appear on its own. On our test site it did not, so we pressed the button.
Step 5: Create the invoice
Click Create invoice.
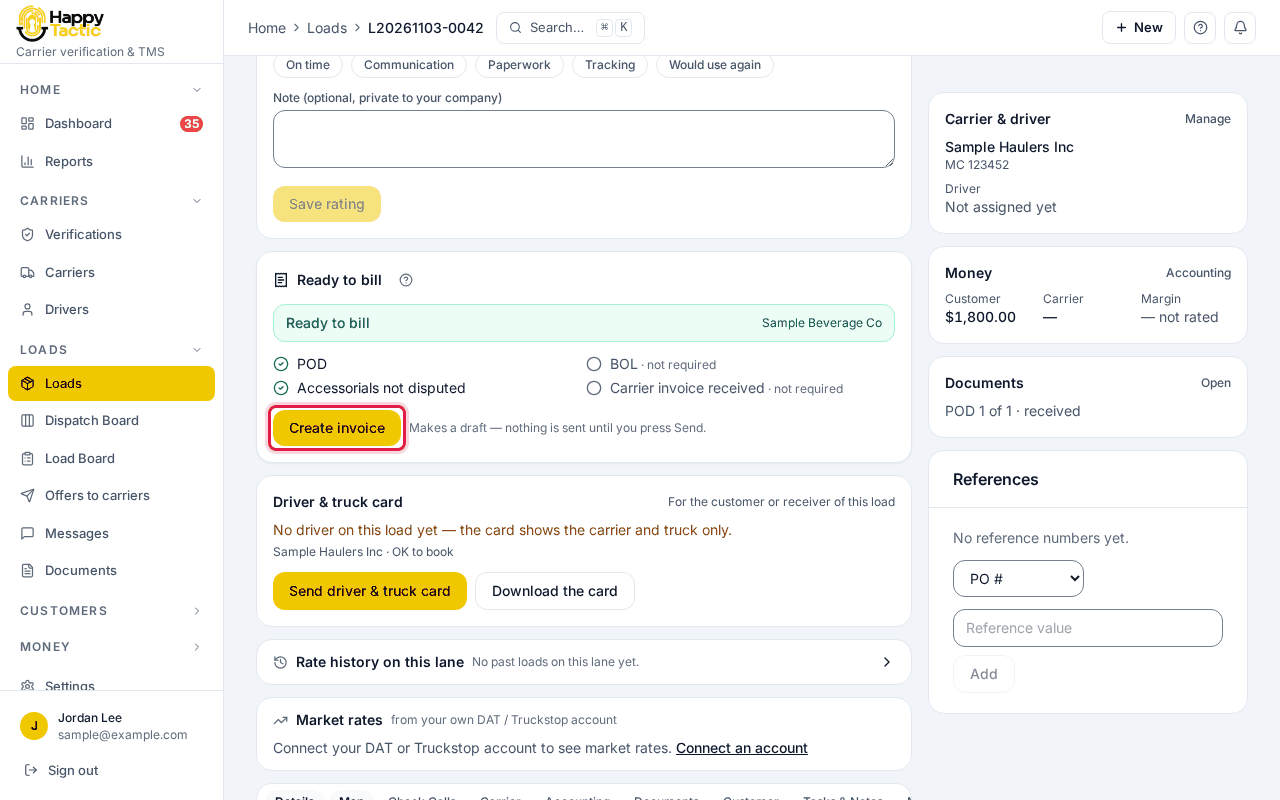
You should see: It makes a draft. Nothing is sent to your customer yet.
Step 6: Review the draft
The invoice number and amount appear. You can add a Deduction or credit (reason and amount) or a Note printed on the invoice.
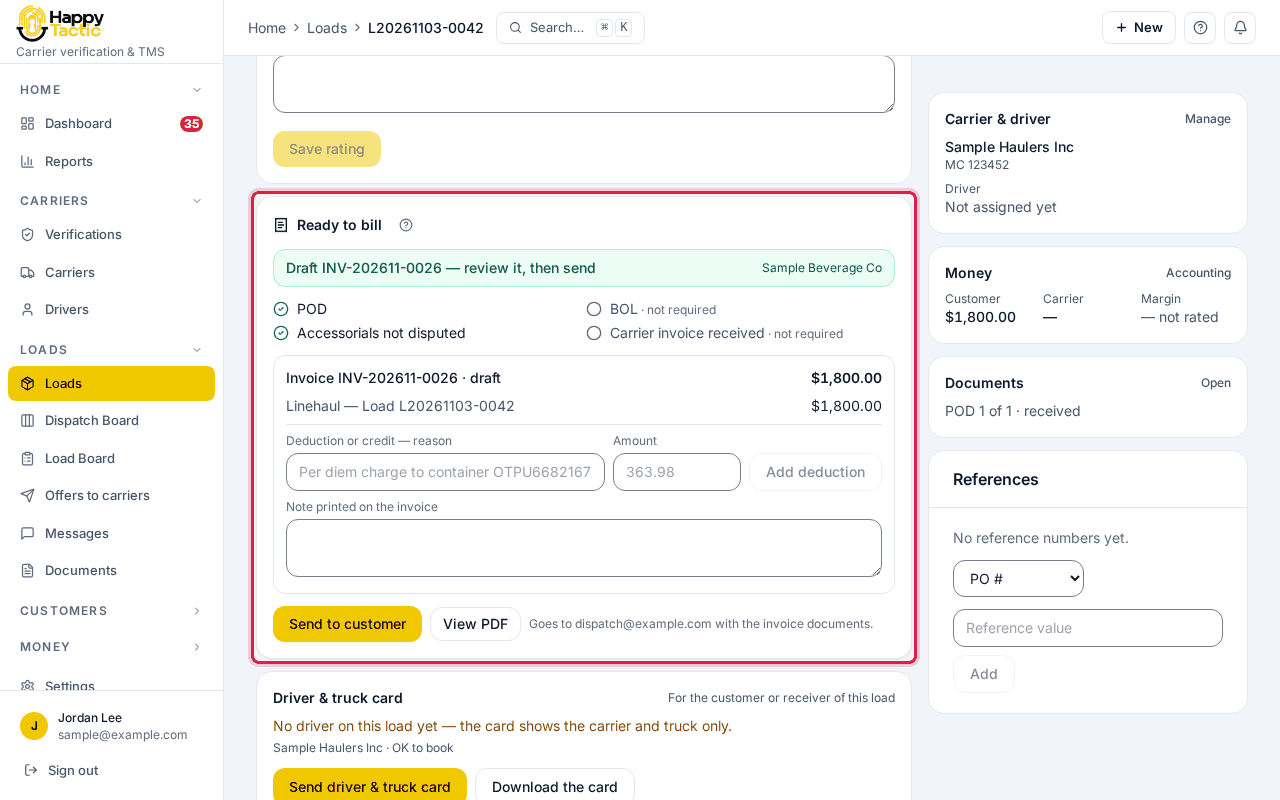
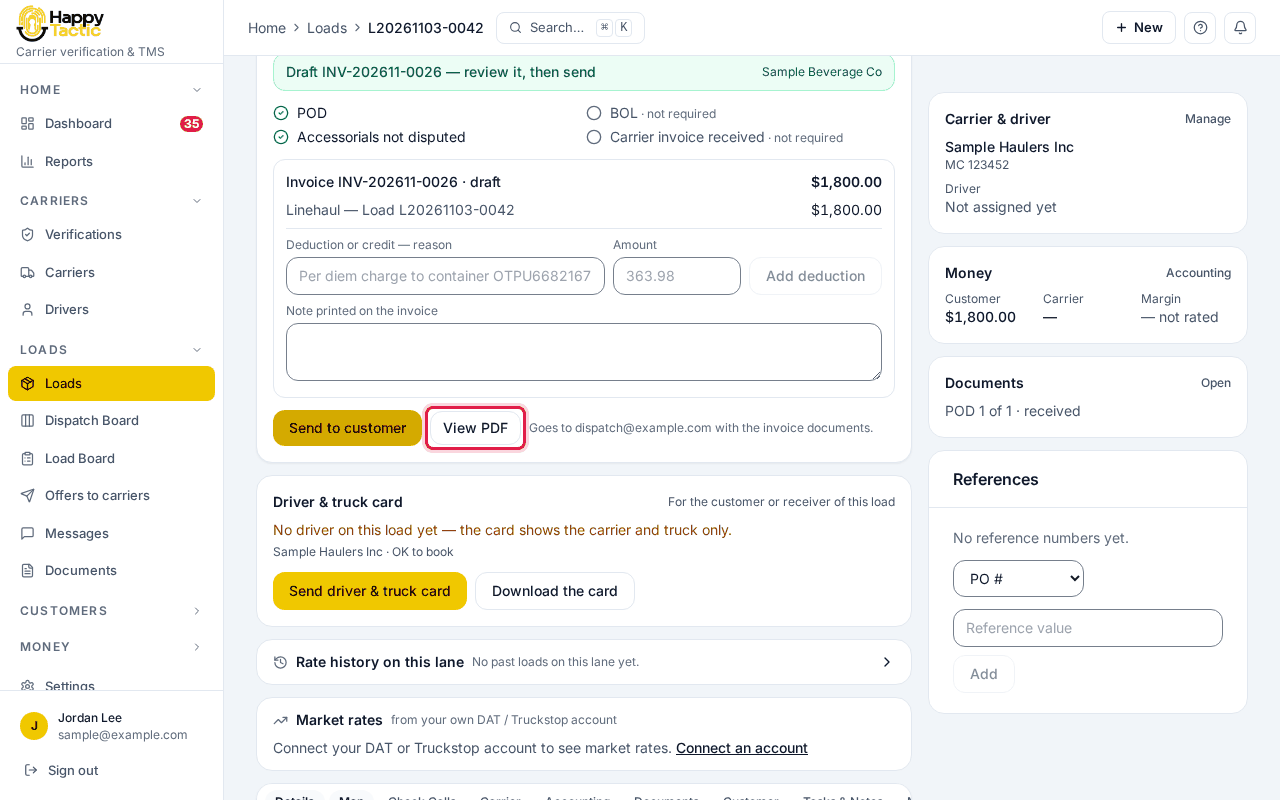
Step 7: Look at the PDF
Click View PDF and check it the way your customer will see it.
Step 8: Check where it goes
The words next to the buttons say who gets the invoice. For a normal customer it is their billing email. For a customer you factor, it goes to your factoring company instead.
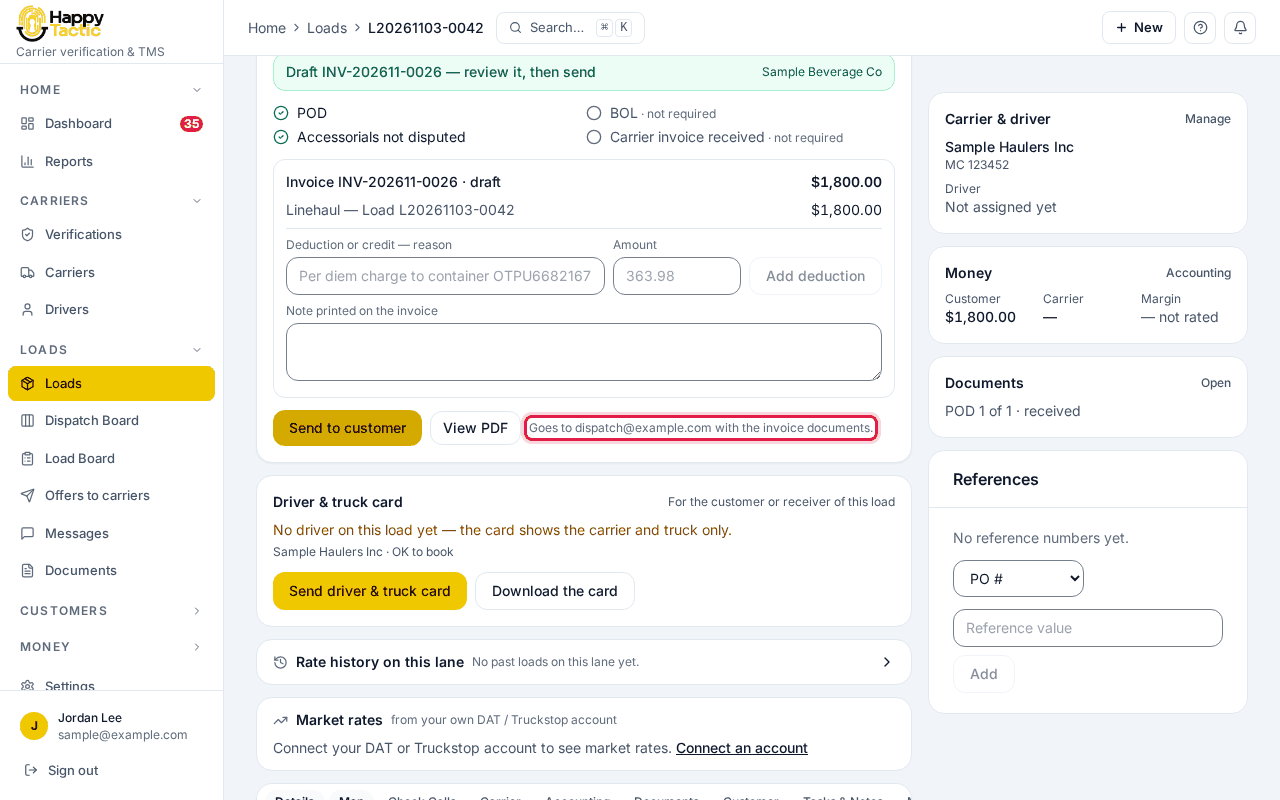
The email address here is a sample. Step 9: Send it
Click Send to customer.
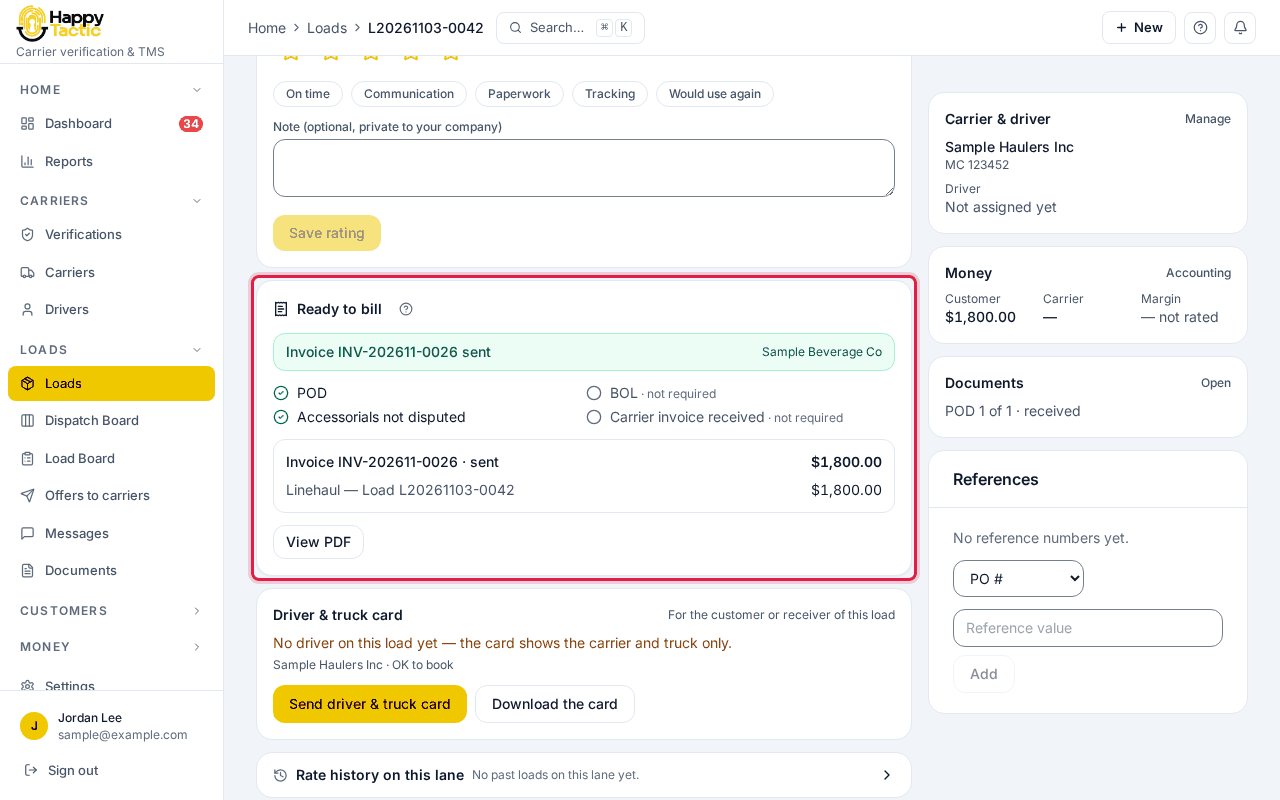
You should see: The bar turns green and says the invoice was sent. The load moves on to Invoiced.
If something goes wrong
- It says “This customer has no billing email — add one on the customer page.”
- Open the customer, add a billing email, and come back.
- The box says Waiting on items and I cannot create the invoice.
- Fix each line with a triangle first. The POD is usually the one.
- I made a mistake on the draft.
- Add a deduction or credit, or a note, before you send.
Still stuck? Open Help & Support in the left menu of the app and send us a message.
What next
These guides usually come next: