Read a verification result
Find out whether you can book a carrier, why we say so, and what to do next.
Steps
Each picture has a red box around what to click. Words in bold are the names you will see on the screen.
Step 1: Open the verification
Click Verifications in the left menu, then click the carrier’s name. The pills at the top (All, In progress, Needs your review, OK to book, Expired, Do not book …) filter the list.
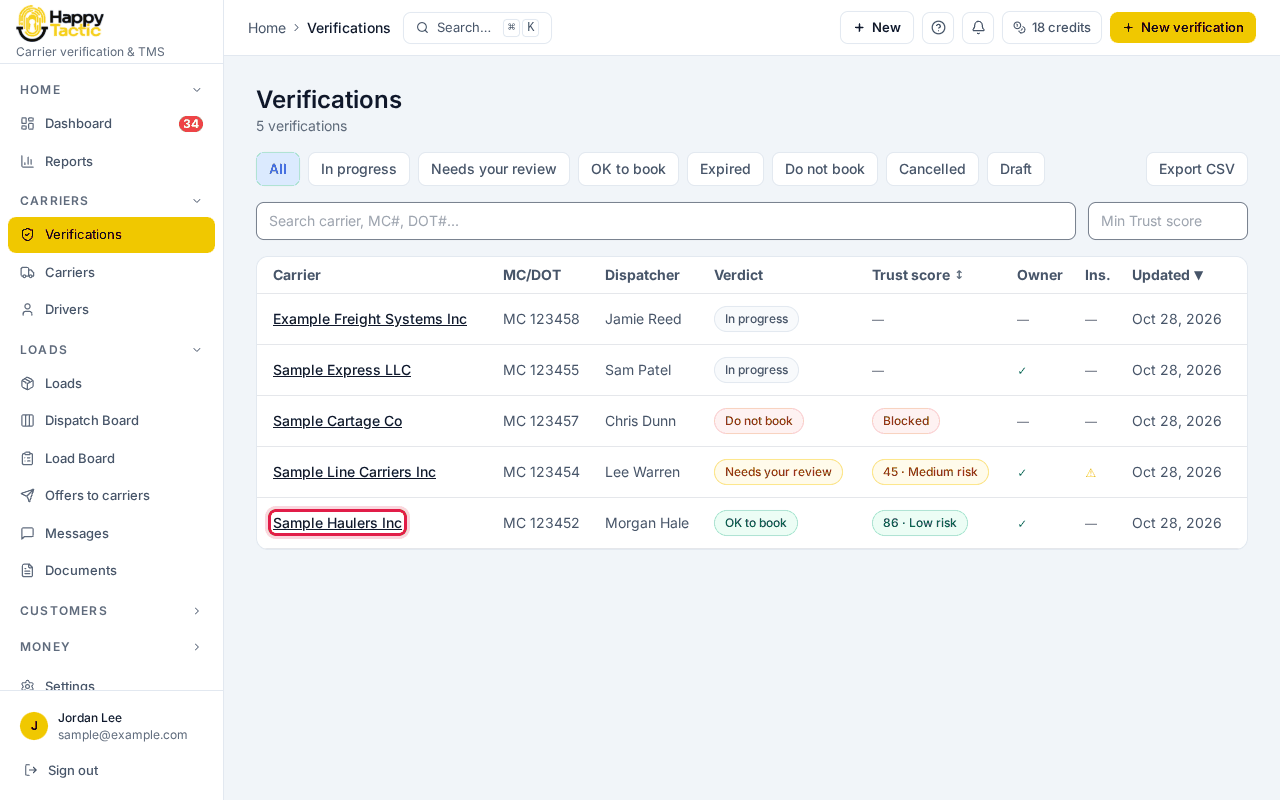
You should see: The verification page opens with the carrier’s name at the top.
Step 2: Read the verdict
The big word at the top is the answer. It is always one of OK to book, Needs your review or Do not book.
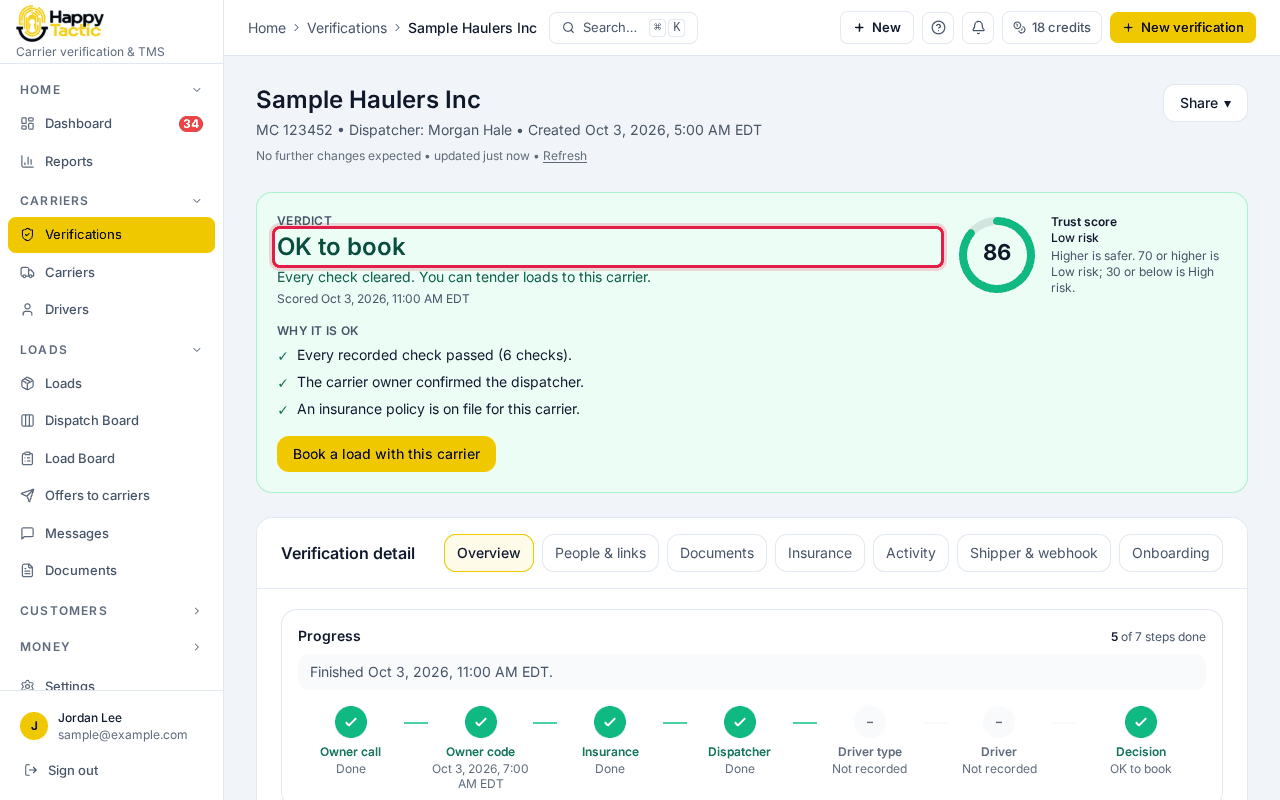
You should see: Green means OK to book, amber means Needs your review, red means Do not book. While we are still waiting on the carrier you see In progress instead.
Step 3: Look at the Trust score
The ring on the right is the Trust score from 0 to 100. Higher is safer.
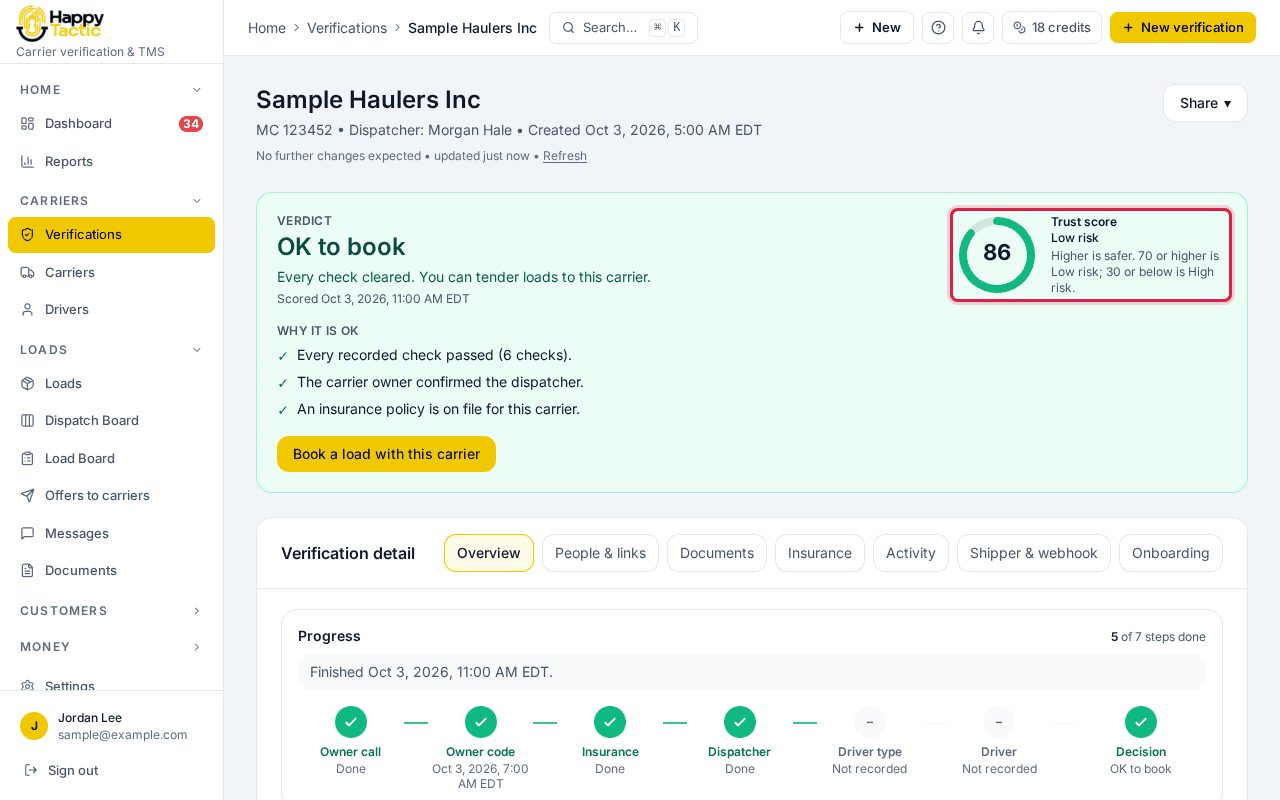
You should see: 70 or higher is Low risk. 30 or below is High risk. In between is Medium risk.
Step 4: Read why
The short list under the verdict explains it. Every line is something we found or could not confirm.
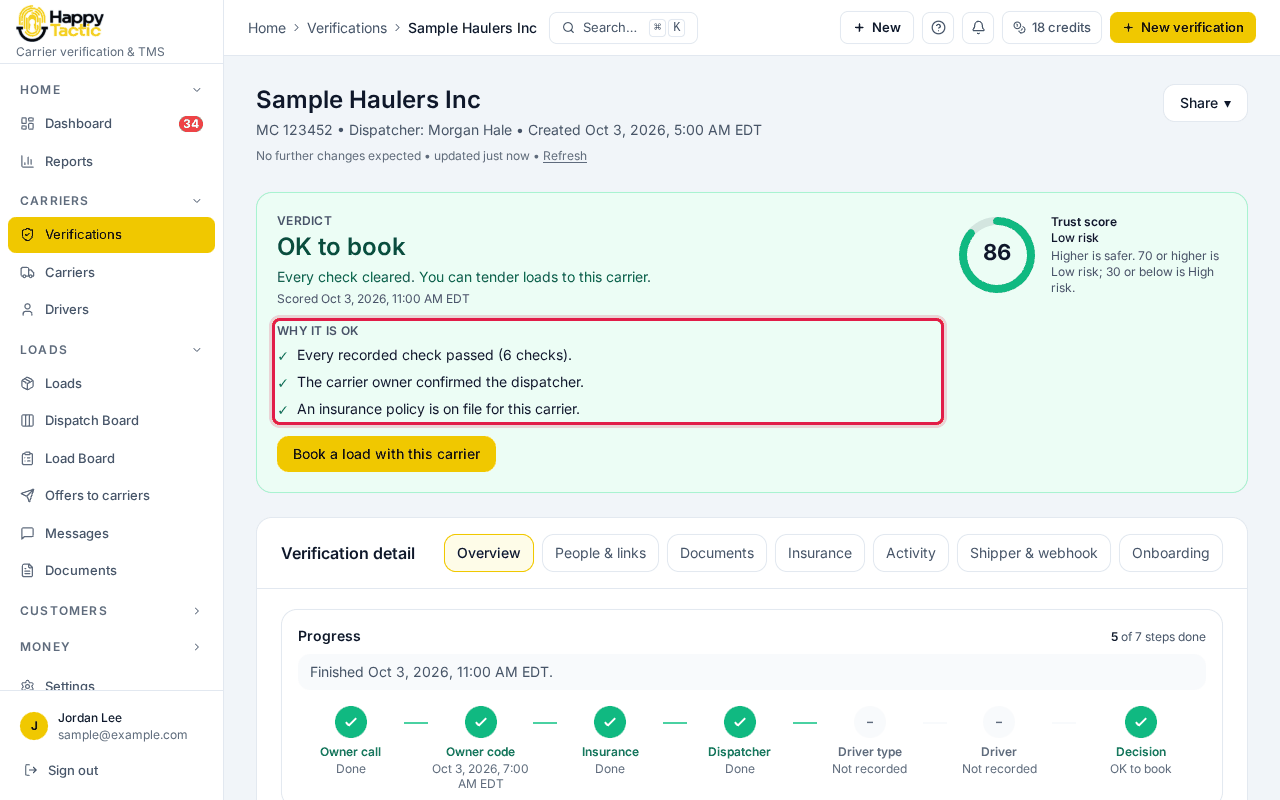
You should see: A tick means confirmed. An exclamation mark means we need you to look. A cross means a blocking problem.
Step 5: See what you can do next
The buttons under the reasons are your next move. On an OK to book carrier, click Book a load with this carrier.
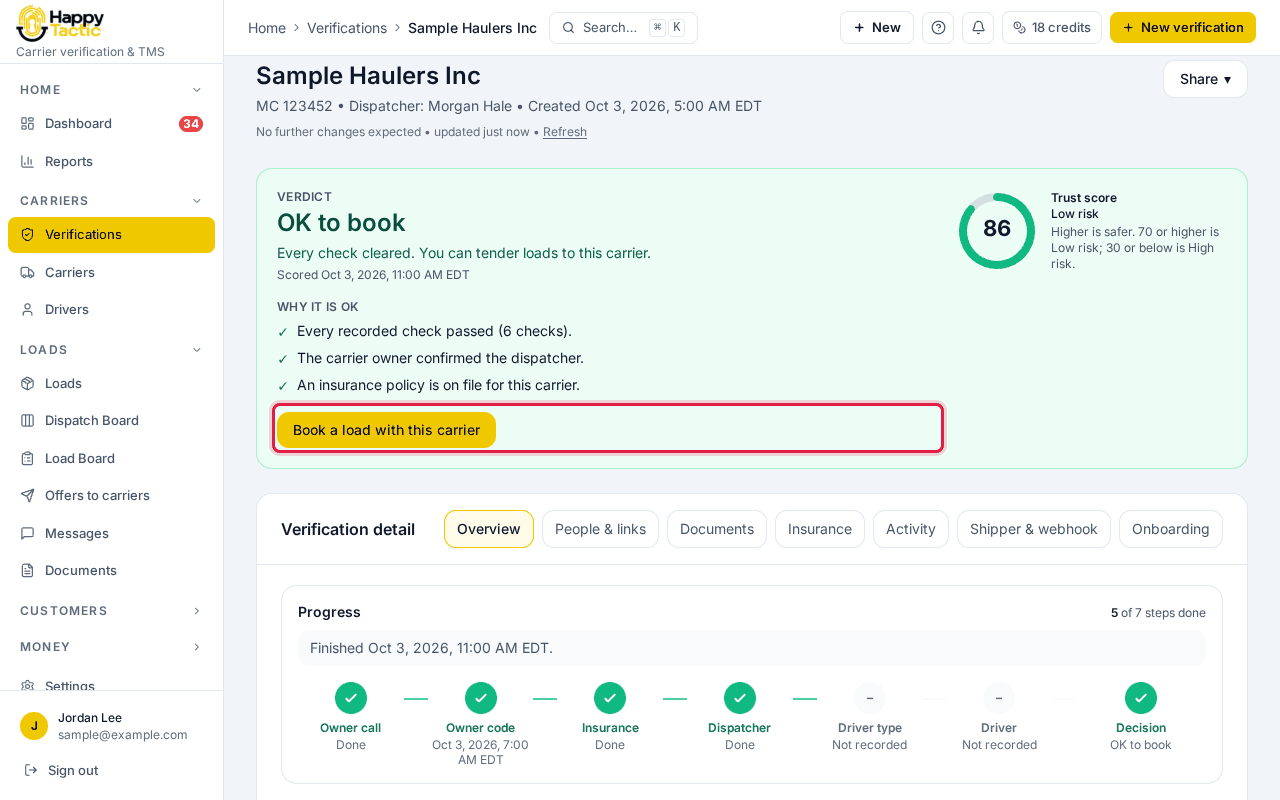
You should see: The new load form opens.
Step 6: Download the evidence for your file
Click Share, then Download evidence PDF. Download report gives a shorter version without photos, and Email report sends it to an address you type.
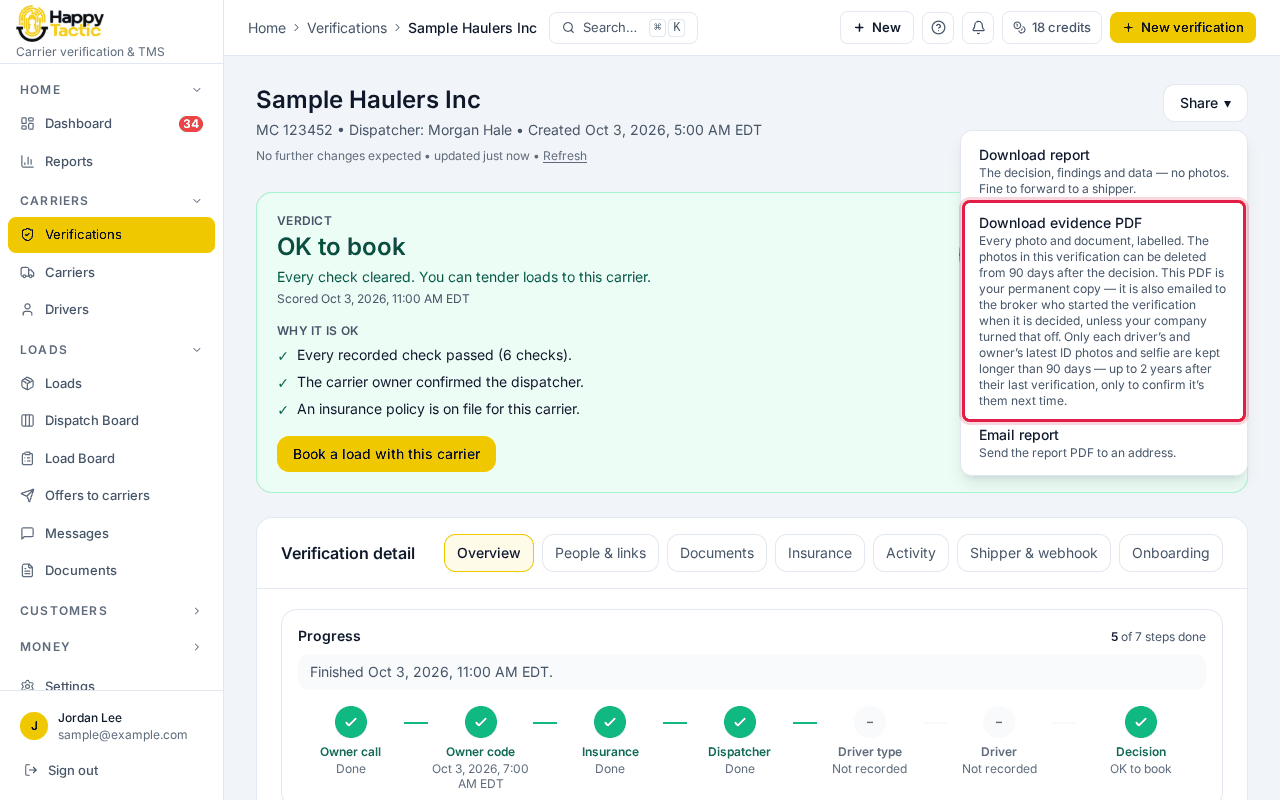
You should see: A PDF saves to your computer. Keep it with the load file as your proof of due diligence.
Step 7: When it says Needs your review, you decide
An amber verdict means every step is in, but the findings need your call. Read the reason, then click Approve — OK to book or Reject — Do not book.
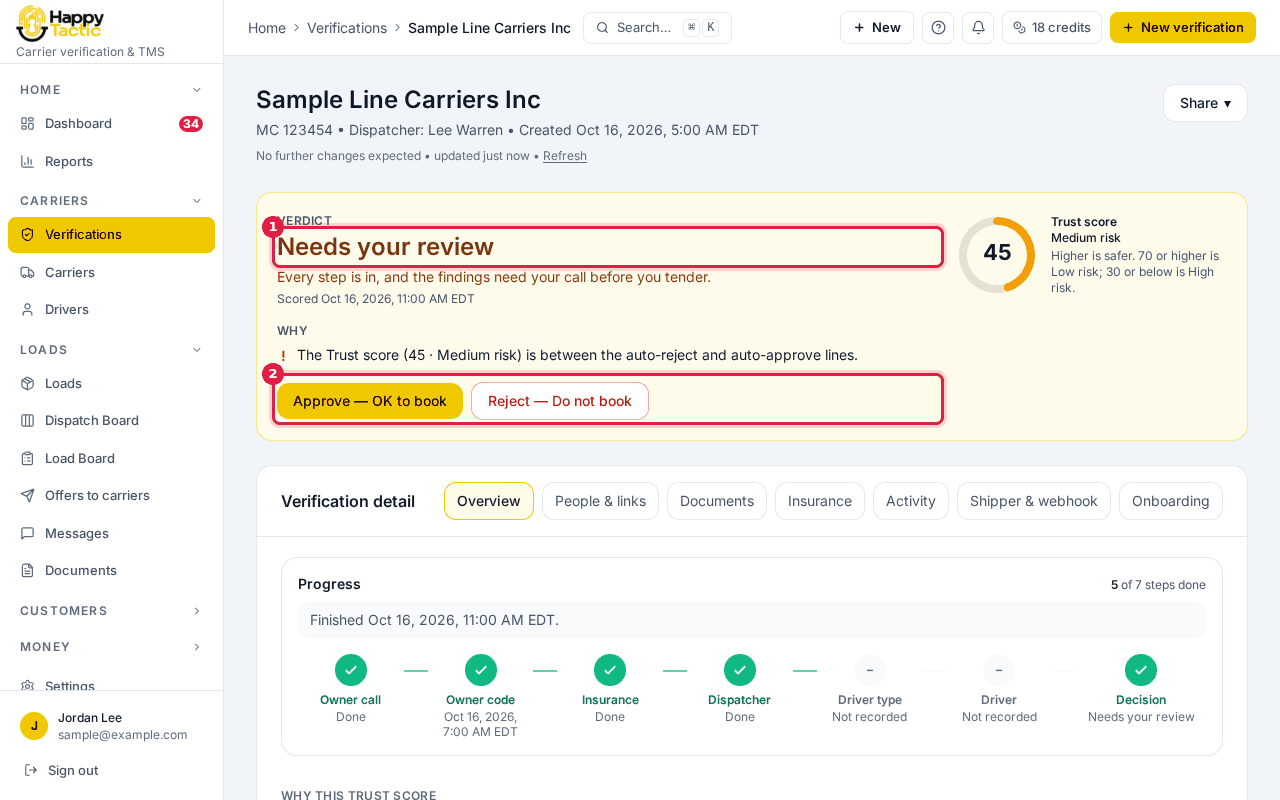
You should see: The verdict changes to the one you chose.
Step 8: When it says Do not book, do not book
A red verdict lists the blocking reasons. Do not send this carrier a load.
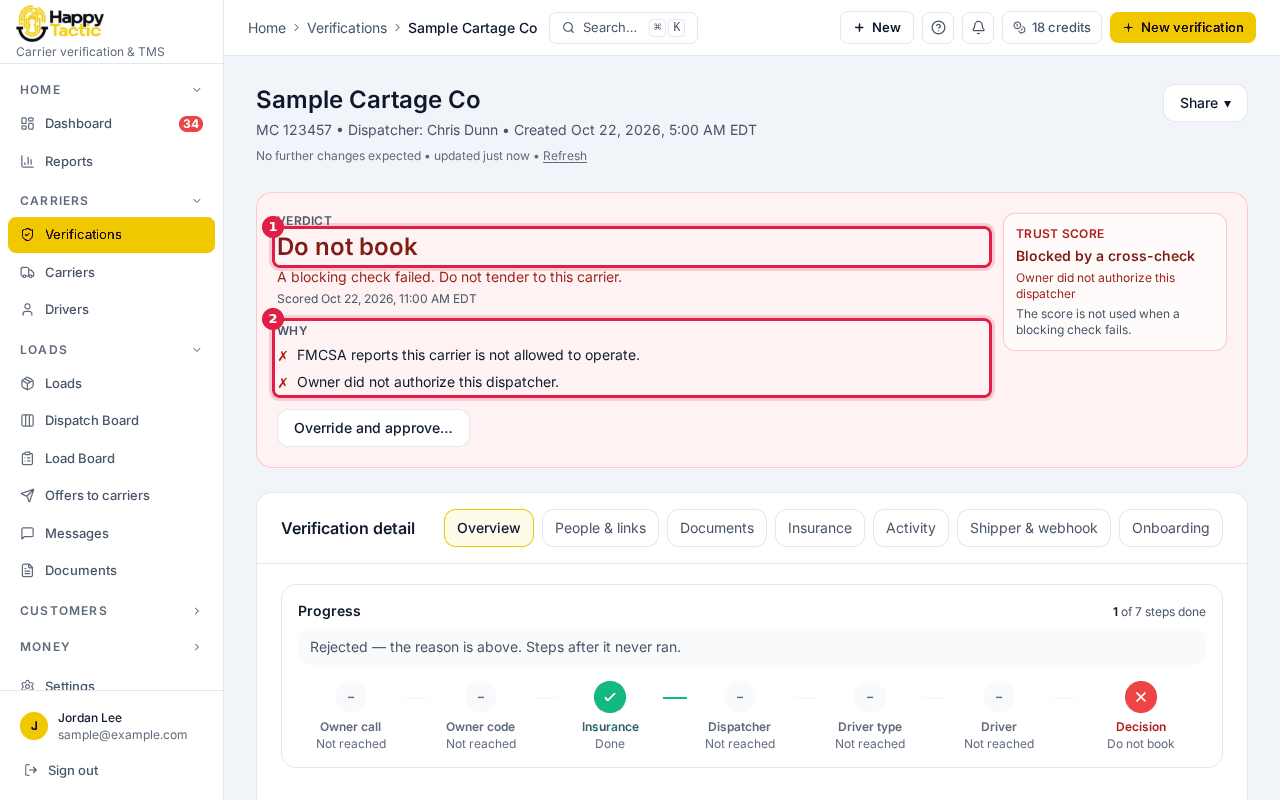
You should see: A blocking reason can be overridden with a written reason, using the Override and approve… button. Only do that if you know why the carrier is safe.
If something goes wrong
- It has said In progress for a long time.
- The carrier owner or dispatcher has not answered yet. Open the People & links tab to see who we are waiting on, and resend the link.
- It says Expired.
- An OK to book result is only good for a while. Verify the carrier again before you book them.
- The Trust score box says “Blocked by a cross-check”.
- A blocking check failed, so the number is not used. Read the reasons under the verdict.
- The list says Updated on one date and the page says Created on another.
- Updated is the last change. Created is when it was started. Both are correct.
Still stuck? Open Help & Support in the left menu of the app and send us a message.
What next
These guides usually come next: