Verify a carrier
Check that a carrier is who they say they are before you book them, and get one clear answer: OK to book, Needs your review or Do not book.
Steps
Each picture has a red box around what to click. Words in bold are the names you will see on the screen.
Step 1: Open a new verification
Click Verifications in the left menu, then click New verification at the top right.
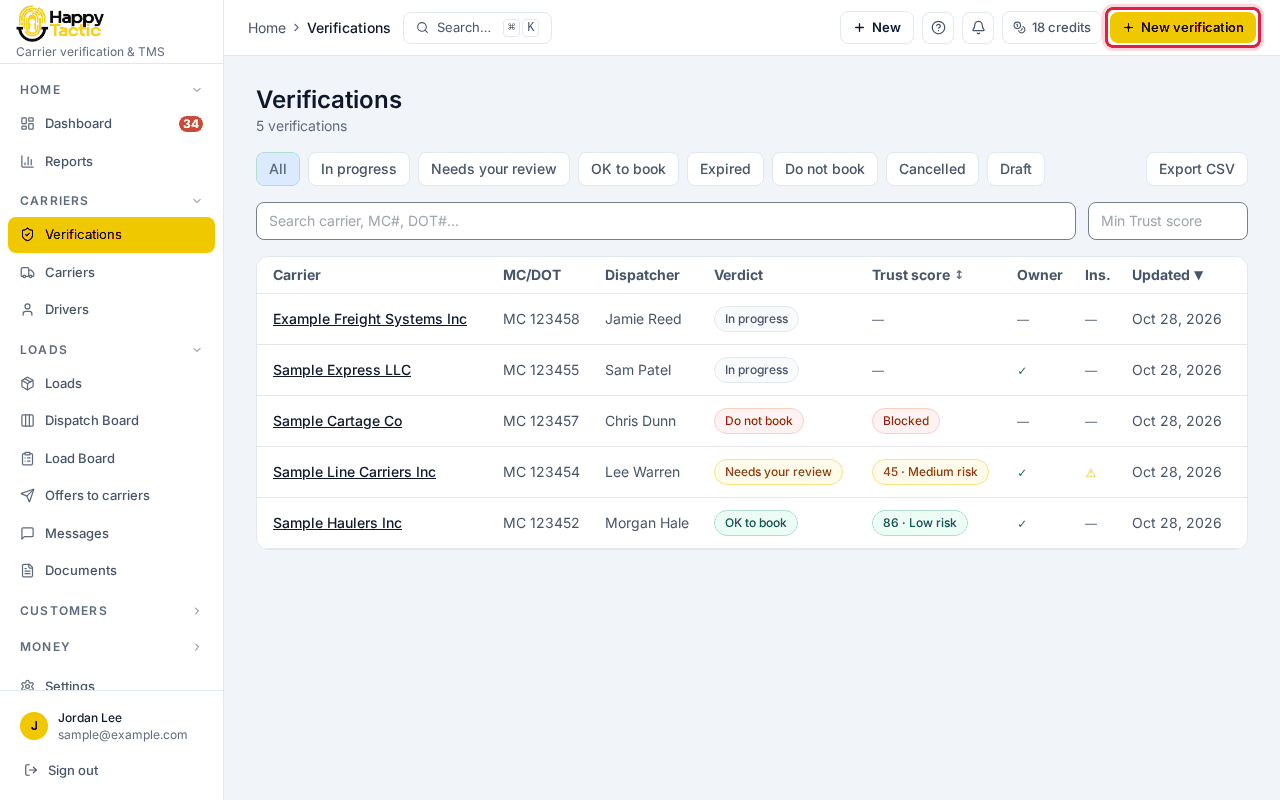
You should see: A page called New Verification opens. It has three steps along the top: Carrier lookup, Contact & load details, and Review & submit.
Step 2: Type the carrier’s number and press Look up
Pick MC number or DOT number, type the number, then click Look up.
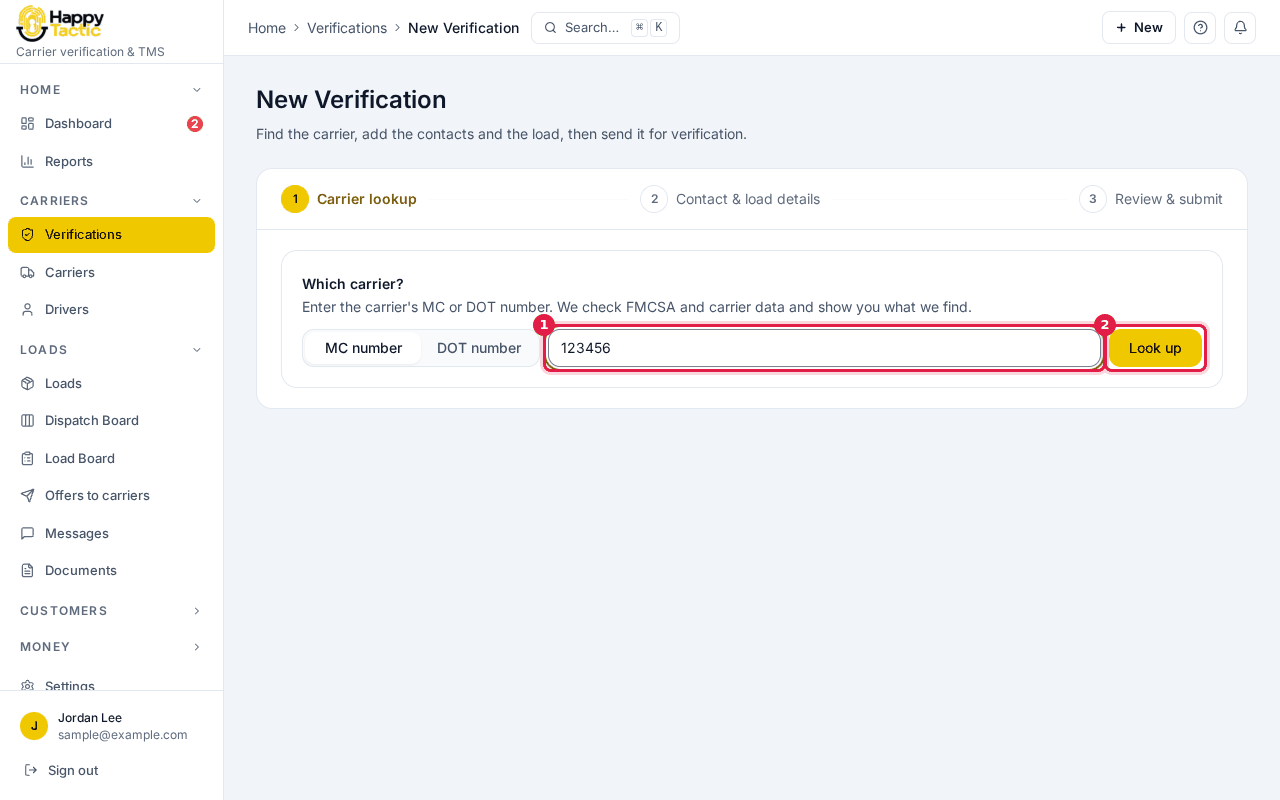
The number shown here is a sample. You should see: After a few seconds the carrier’s name, MC and DOT numbers, address and phone appear, with a green Authorized or a red Not authorized label.
Step 3: Make sure it is the right company
Read the name, address and phone against what you know about the carrier. The box underneath says “Nothing to check before you continue” or lists what to check. Scroll down to see the tiles for Authority, Insurance, Safety rating and more.
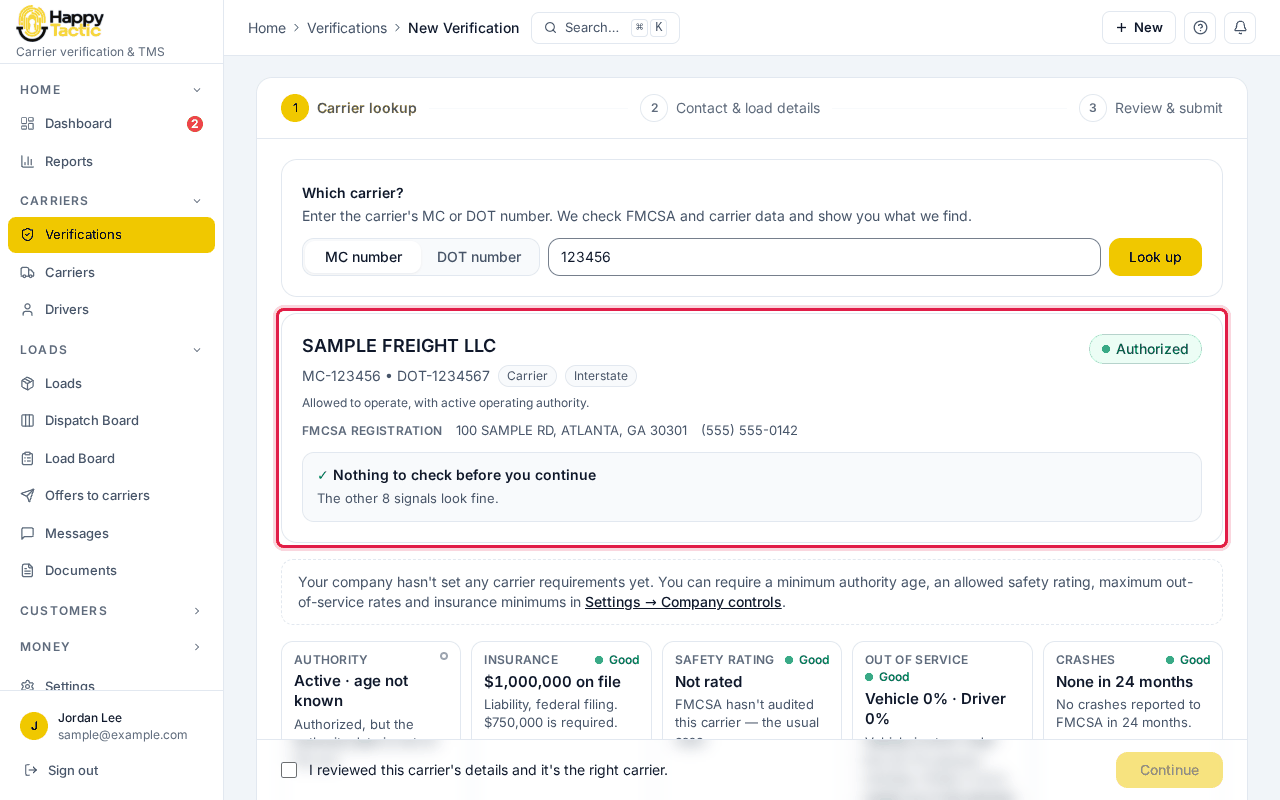
The name, address and phone here are made up. You should see: Below the card you see a row of colored tiles (Good, Caution, Check). Tap any tile to open its details.
Step 4: Confirm the carrier and continue
Tick I reviewed this carrier’s details and it’s the right carrier, then click Continue.
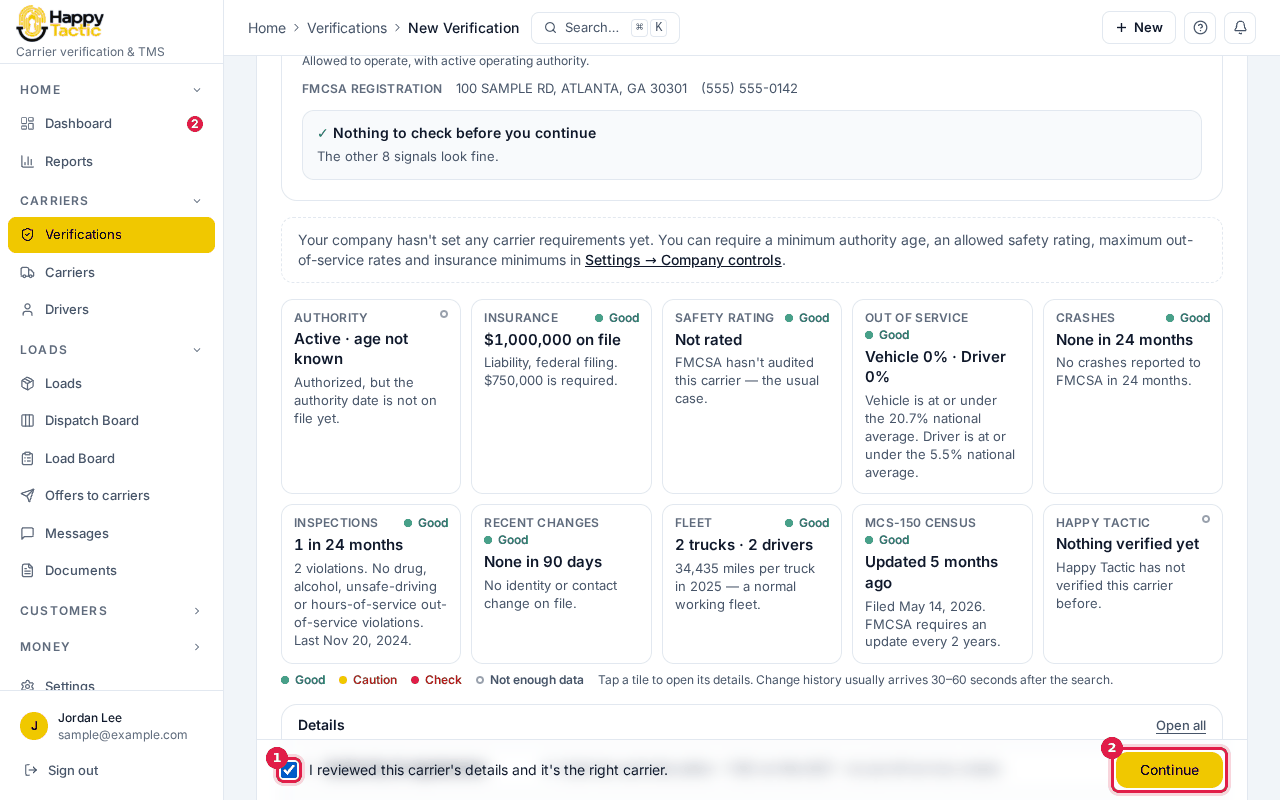
You should see: Step 2, Contact & load details, opens. Continue stays grey until the box is ticked.
Step 5: Enter the owner’s email and phone
Under Owner contact, type the owner’s email and phone as you have them.
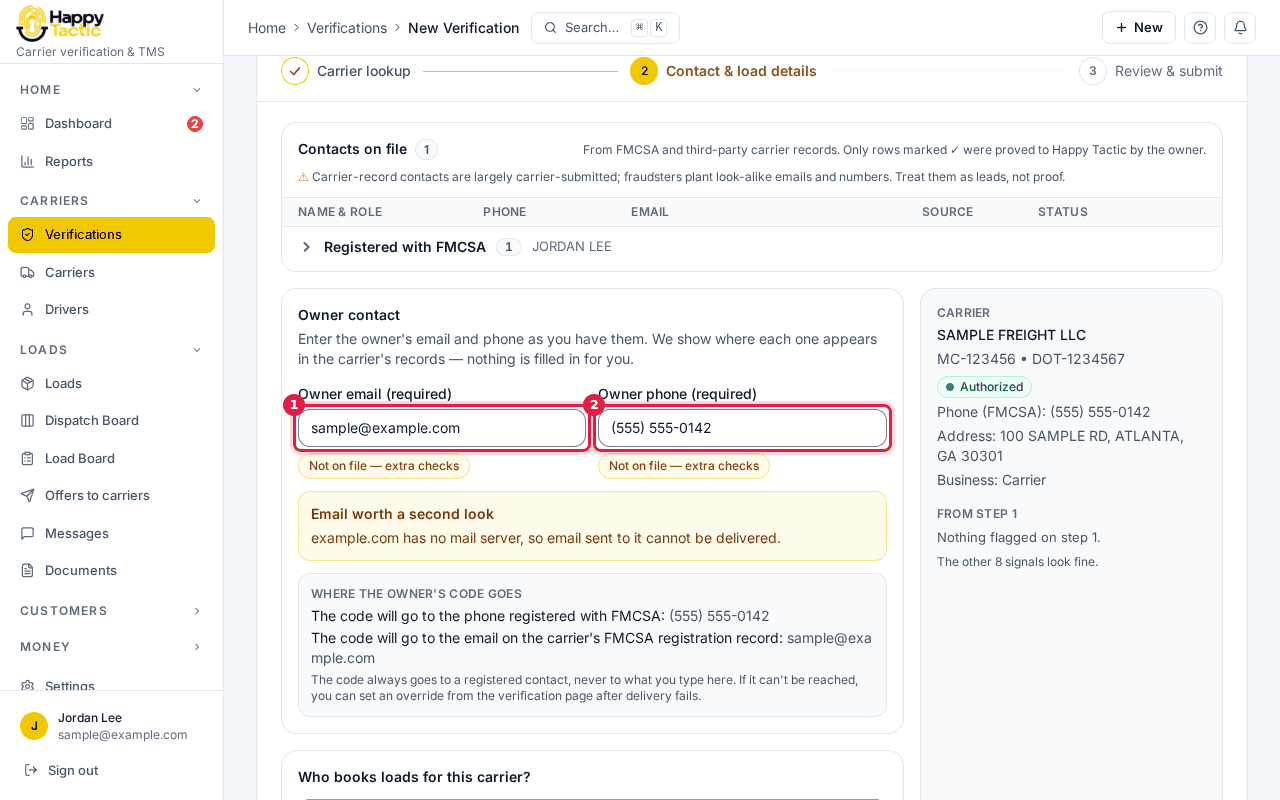
The note on the right of each box is normal when what you typed is not on the carrier’s record yet. You should see: A yellow note “Not on file — extra checks” can appear. That is fine; it only means we will check harder. A box also explains where the owner’s code is sent: always to the contact registered with FMCSA, never to what you typed.
Step 6: Name the dispatcher you deal with
Under Who books loads for this carrier? choose A dispatcher, then fill in Dispatcher name and Dispatcher phone. The email is optional. If the owner drives and books their own loads, choose that option instead.
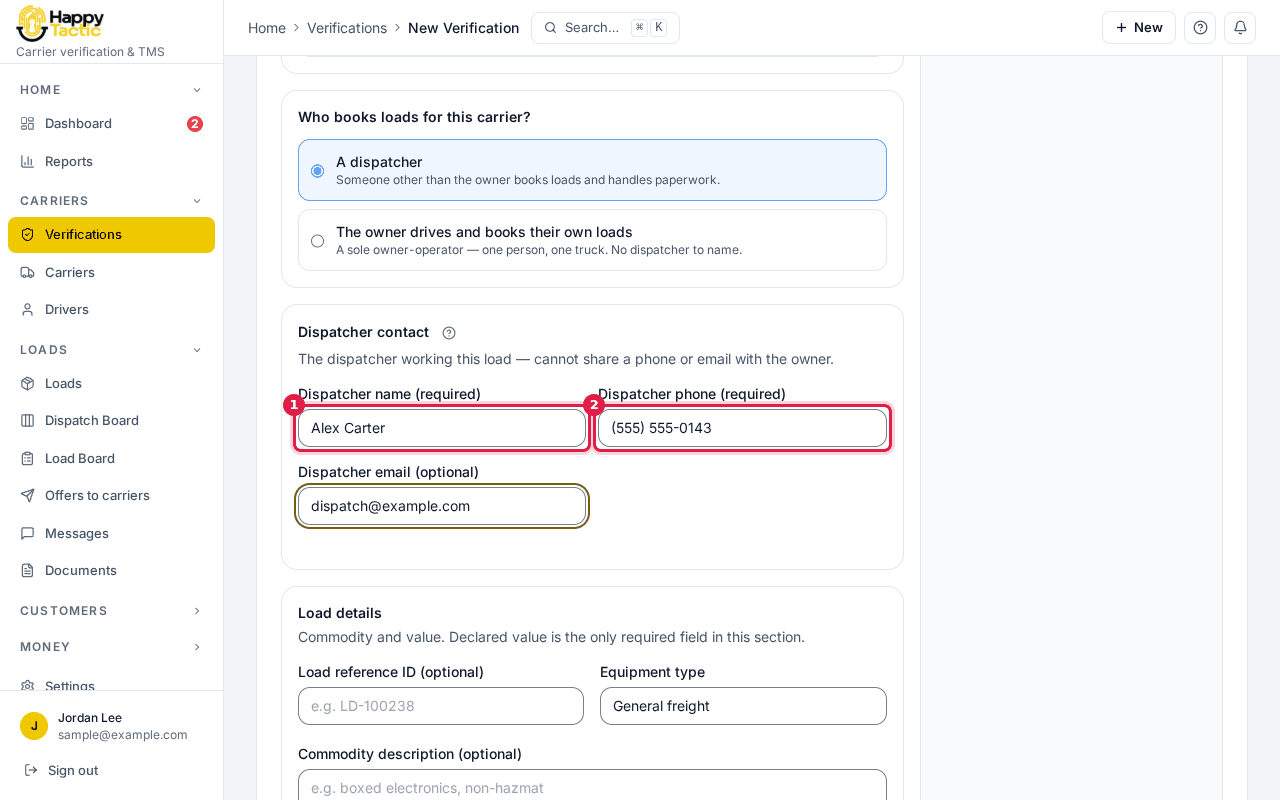
You should see: We later ask the owner to confirm this person. If the owner does not recognize them, the verdict becomes Do not book.
Step 7: Add the load details
Type the Declared value — it is the only required box here. Everything else on this screen is optional. Click Continue.
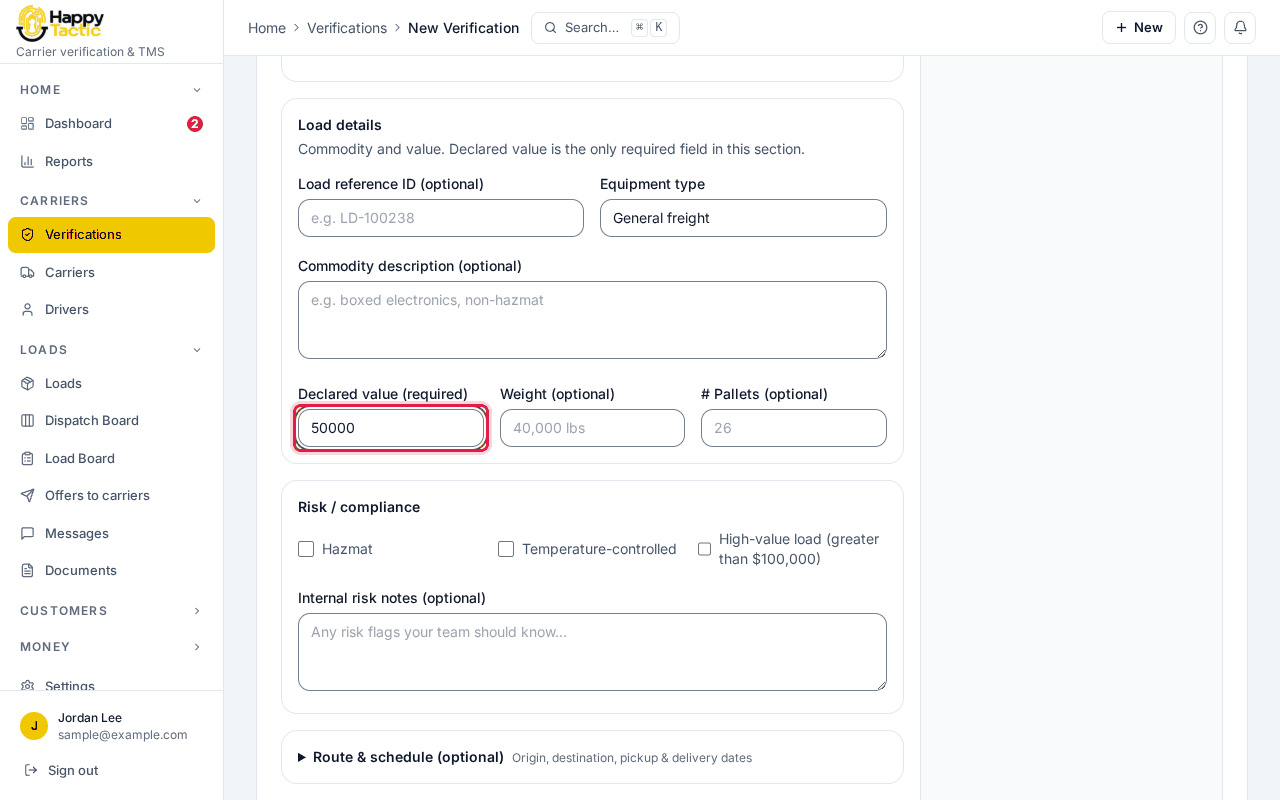
You should see: Step 3, Review & submit, opens.
Step 8: Check the summary and submit
Read the summary, then click Submit verification. Use Save draft if you want to finish later.
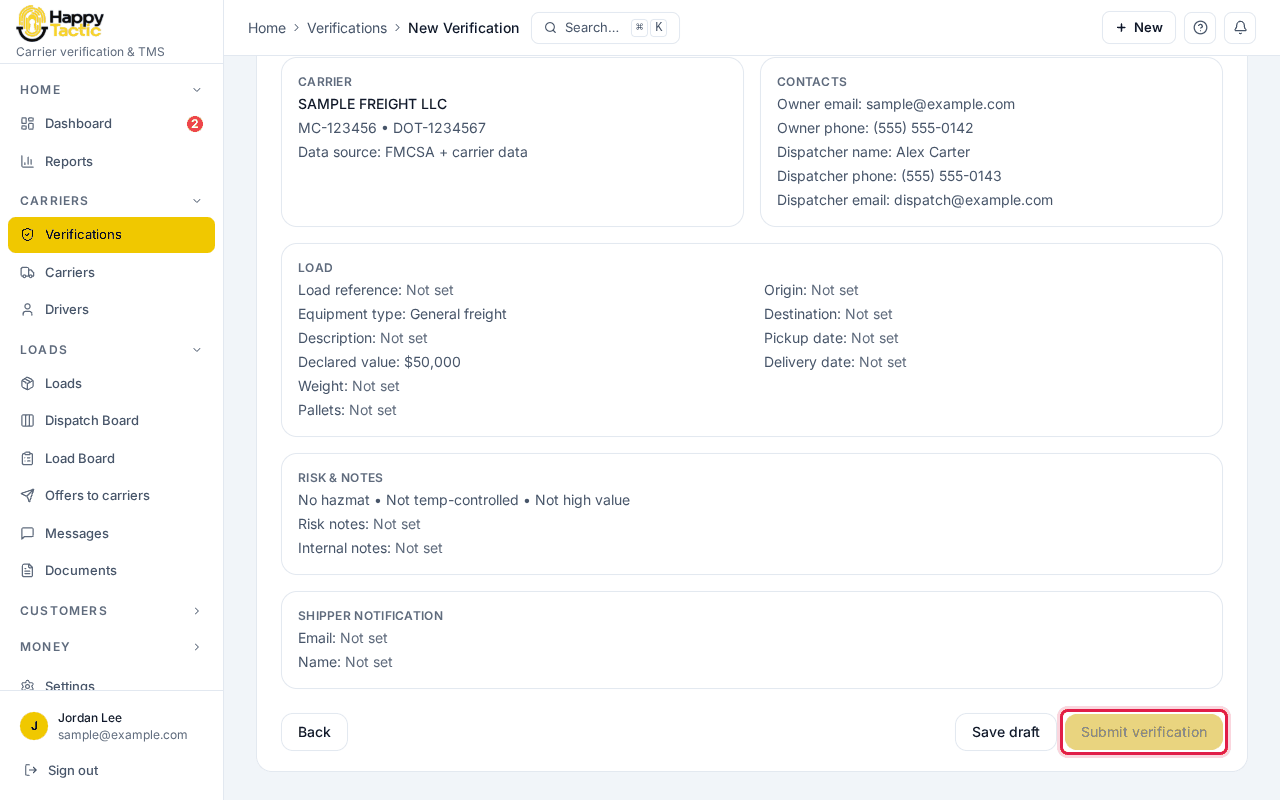
The Submit verification button looks faded here only because our sample account had no credits left. Yours is solid yellow when you have credits. You should see: We contact the owner, collect the insurance and documents, and then give you the verdict. The verification shows as In progress in your Verifications list until it is decided. See “Read a verification result” for what comes next.
If something goes wrong
- I see “No carrier found for MC …”.
- Check the number for a typo. If you have the DOT number, click Search by DOT number instead. A brand-new authority may not be on file yet — contact Happy Tactic support.
- The carrier shows Not authorized.
- FMCSA has no active operating authority on file for them. Do not book until that is cleared up.
- The message says my account is out of verification credits.
- New verifications are paused until you add credits or renew your plan. Go to Settings, then Billing.
- Continue is grey and I cannot click it.
- Tick the box that says you reviewed the carrier’s details. On step 2, fill in every box marked “required”.
- It says “Additional carrier records are temporarily unavailable”.
- Some outside records could not be refreshed right now. You can continue; we keep checking in the background.
Still stuck? Open Help & Support in the left menu of the app and send us a message.
What next
These guides usually come next: