Pay the carrier
Approve what you owe each carrier, schedule it, and mark it paid when the money goes out.
Steps
Each picture has a red box around what to click. Words in bold are the names you will see on the screen.
Step 1: Open Accounting
In the left menu, click Money, then Accounting.
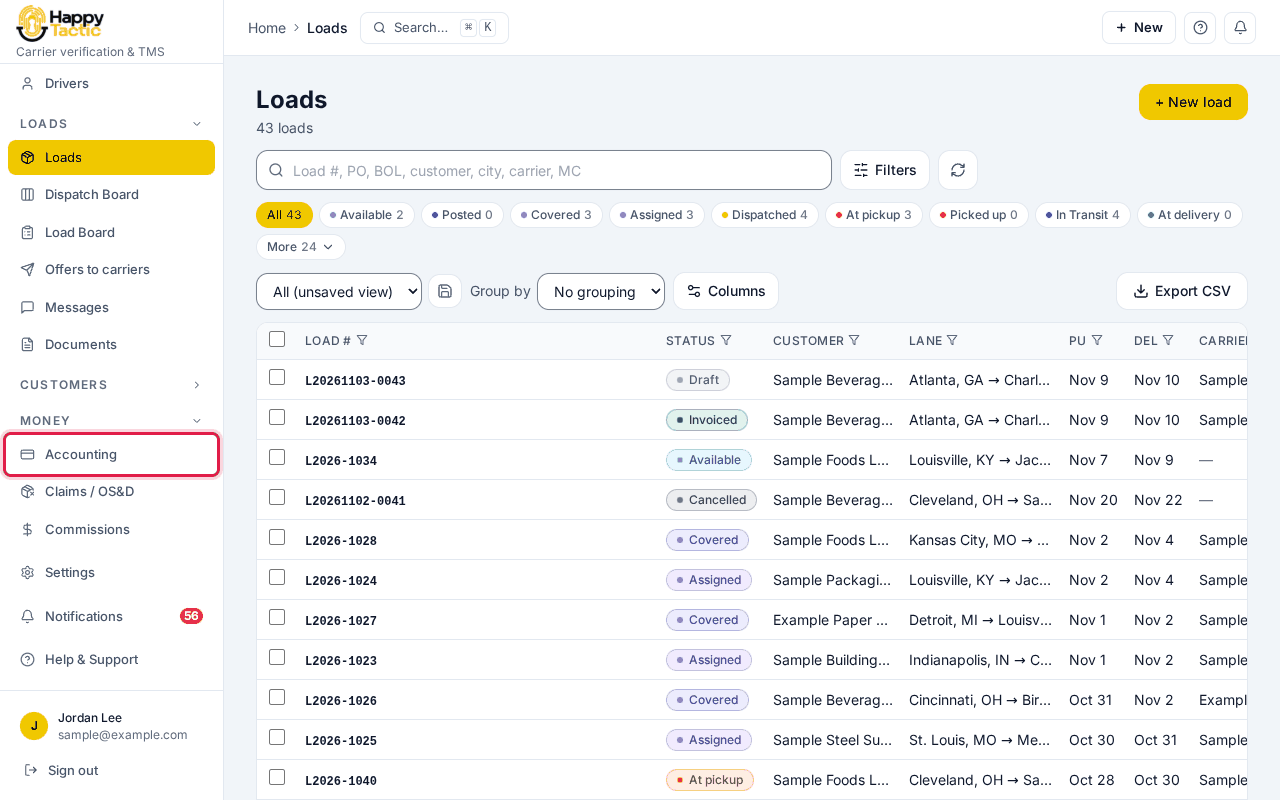
You should see: Accounting opens with a row of tabs across the top.
Step 2: Click the Carrier pay tab
Click Carrier pay. It lists what you owe each carrier, one line per load.
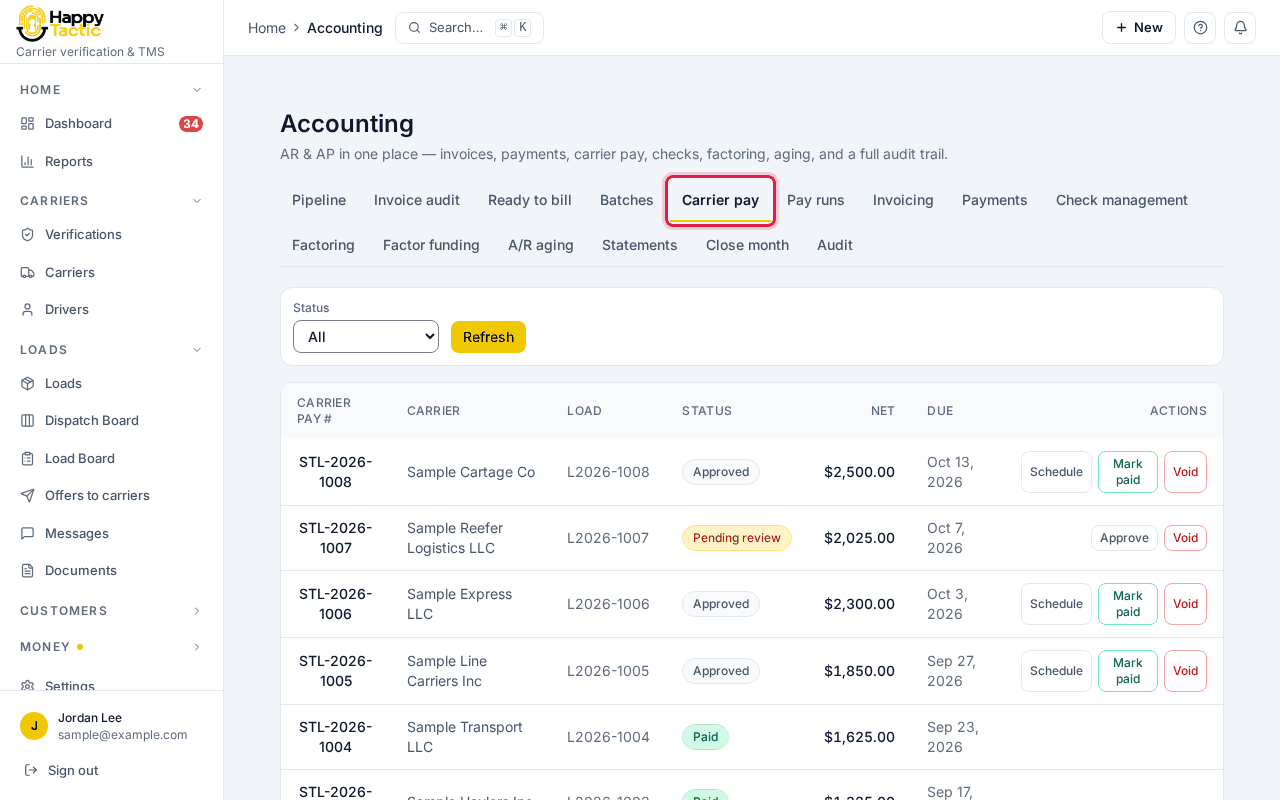
You should see: Each line has a number, the carrier, the load, a status, the amount and the due date.
Step 3: Find what is due
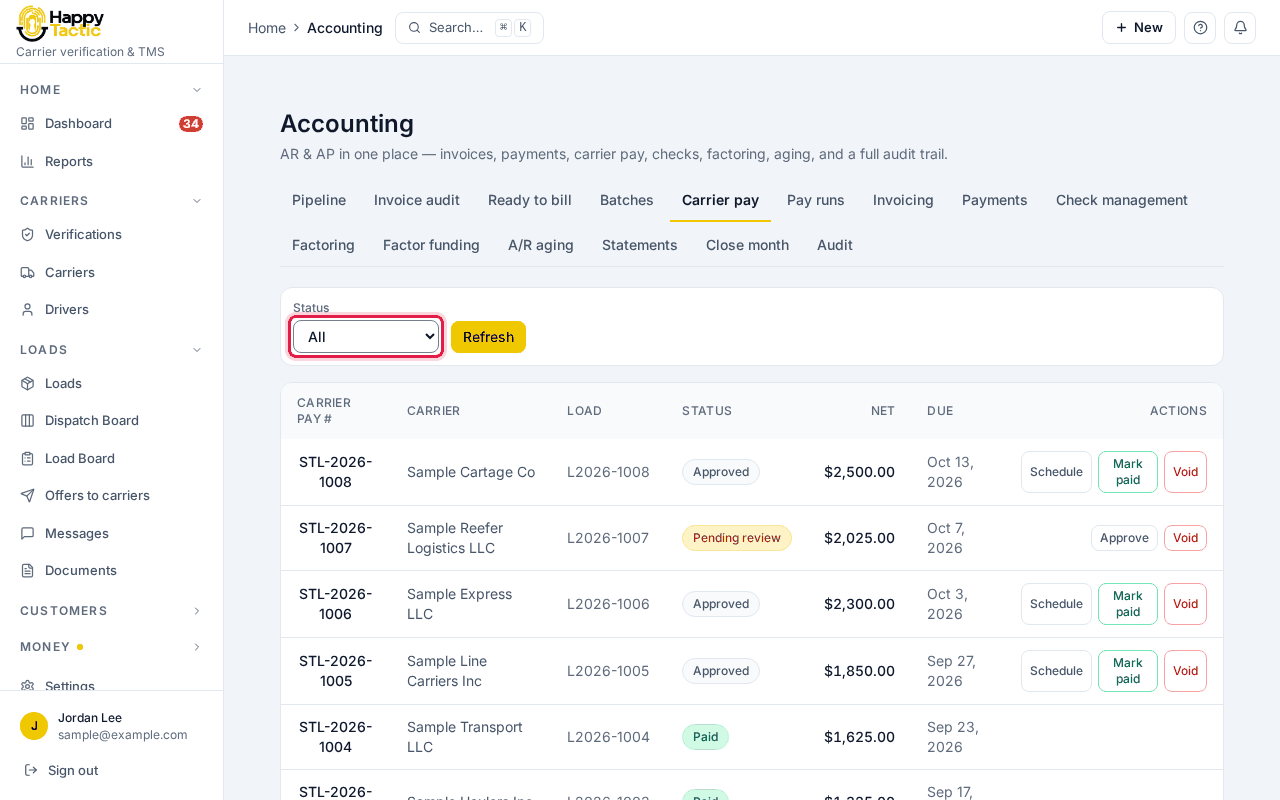
Use the Status box to show only the lines you want, such as those waiting for review or already approved.
Step 4: Approve it
On a line that says “Pending review”, click Approve once the carrier’s invoice matches your rate con.
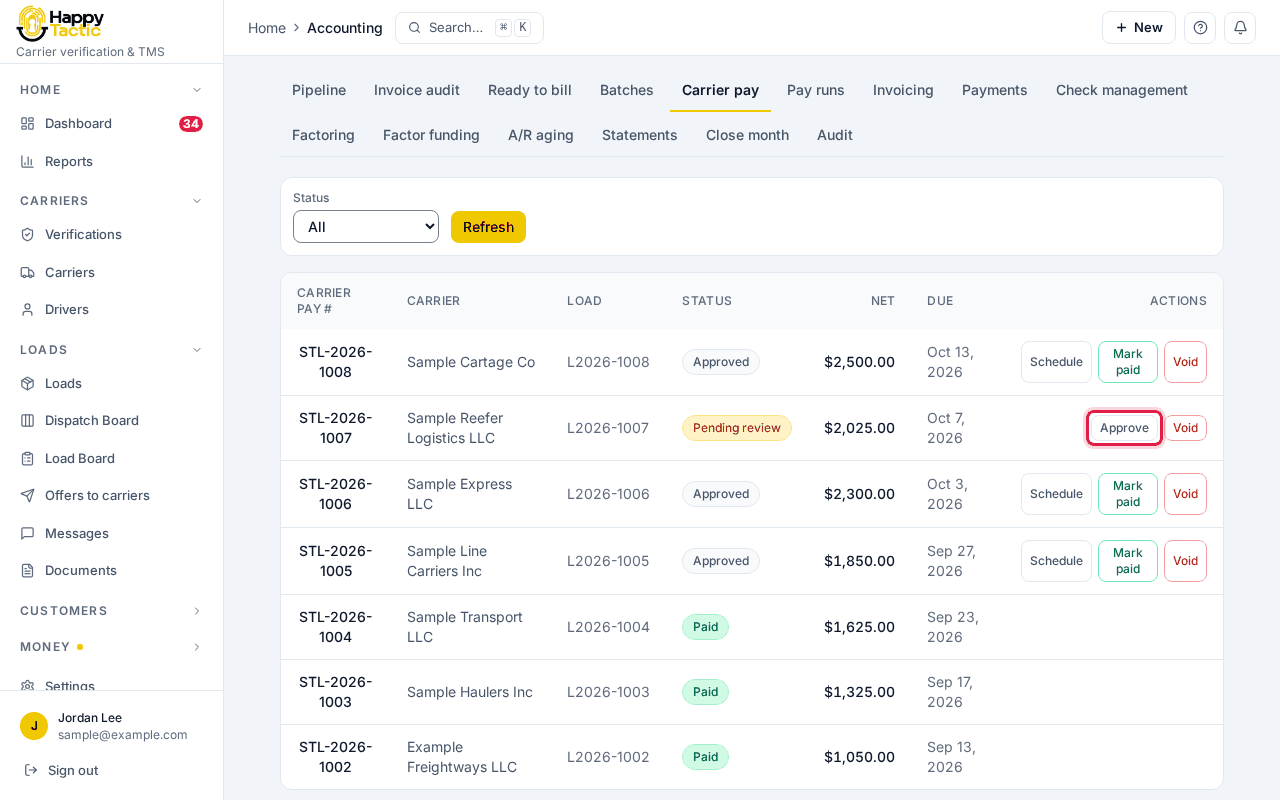
You should see: The line changes to Approved and gets three new buttons: Schedule, Mark paid and Void.
Step 5: See the new buttons
An approved line is ready. Click Schedule to set when it will be paid, or go straight to Mark paid.
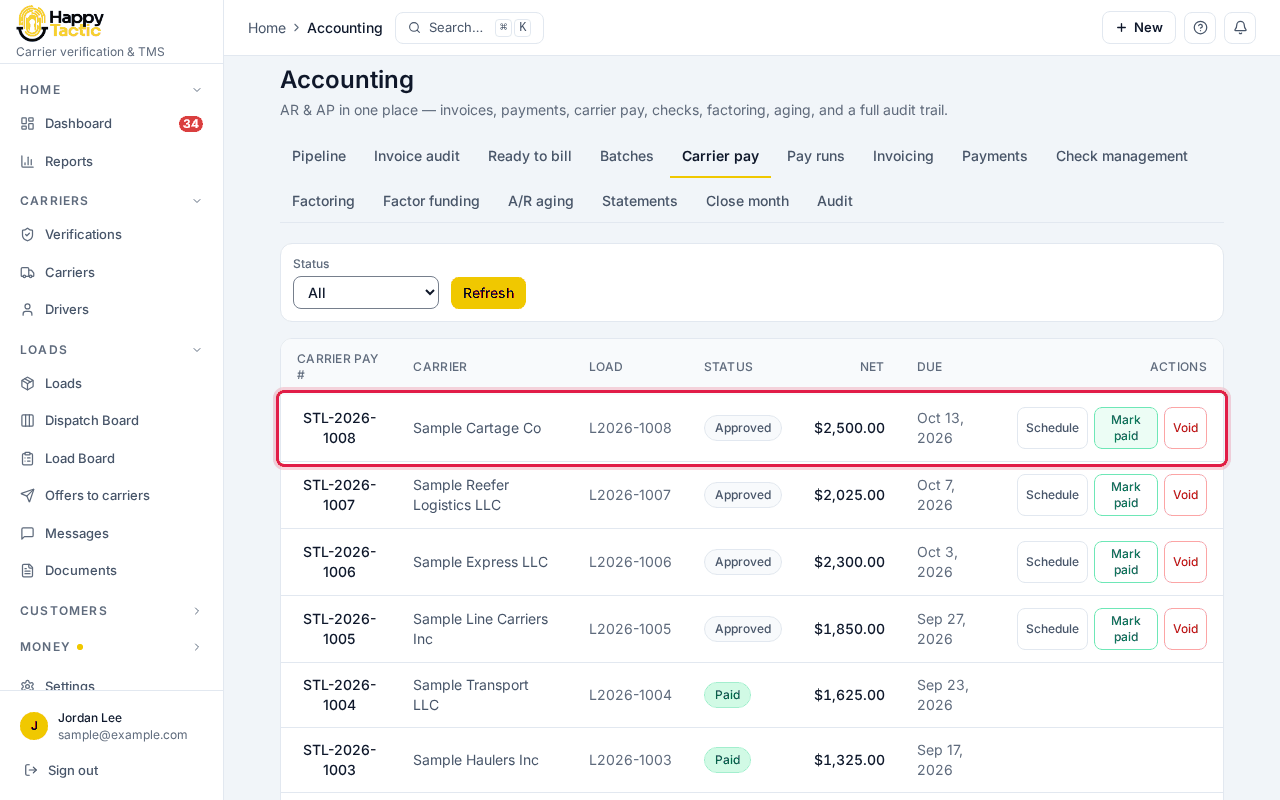
Step 6: Pick Schedule or Mark paid
Schedule lines it up to be paid. Mark paid records that the money has gone out. Void cancels the line.
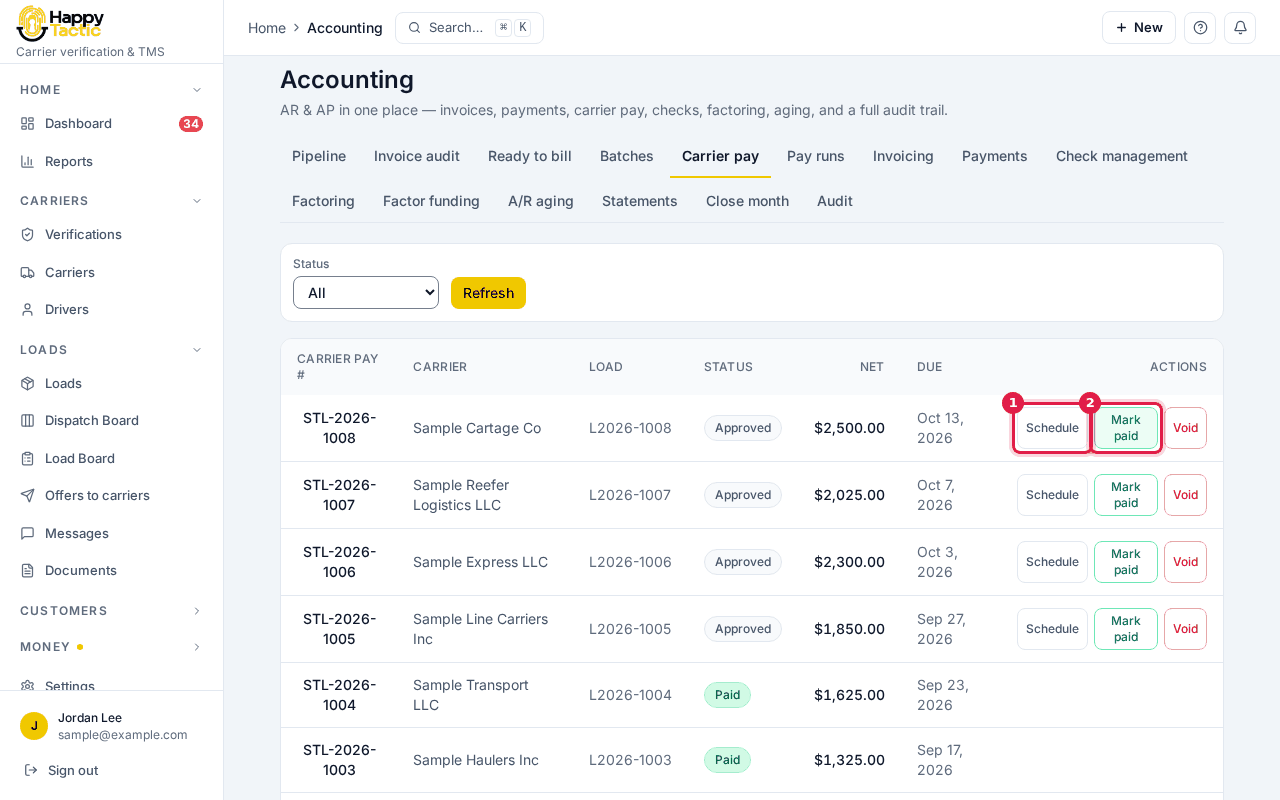
Step 7: Mark it paid
In the window, choose the Payment method (ACH, Wire or Check) and the quick-pay tier if one applies, then click Mark paid.
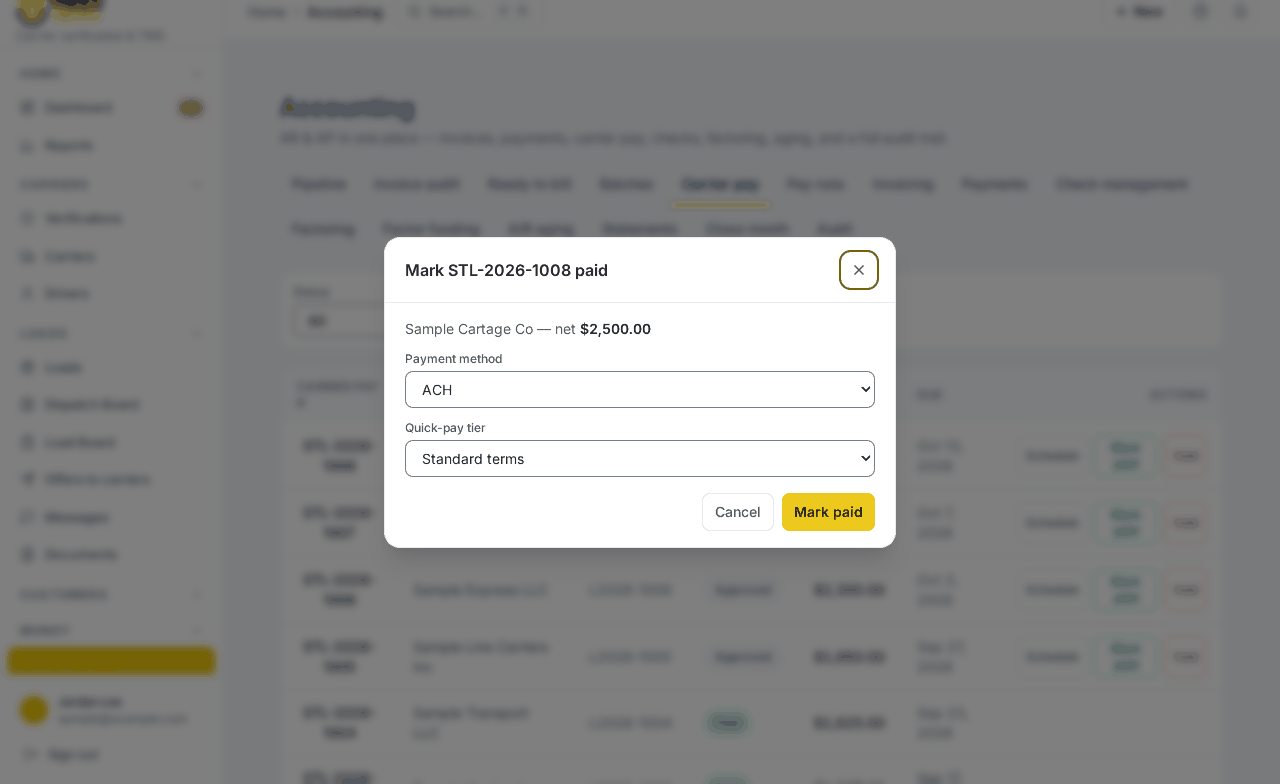
We did not press Mark paid here, to keep the sample data as it was. You should see: The line moves to Paid. A carrier that has a factoring company is paid to the factor.
If something goes wrong
- There is no Approve button on a line.
- Only a line that is Pending review can be approved. Approved lines show Schedule and Mark paid instead.
- I marked the wrong line paid.
- Ask an admin to check the Audit tab in Accounting. It records who did what and when.
- The carrier pay line is missing.
- Make sure the Status box says All, then click Refresh.
Still stuck? Open Help & Support in the left menu of the app and send us a message.
What next
These guides usually come next: